
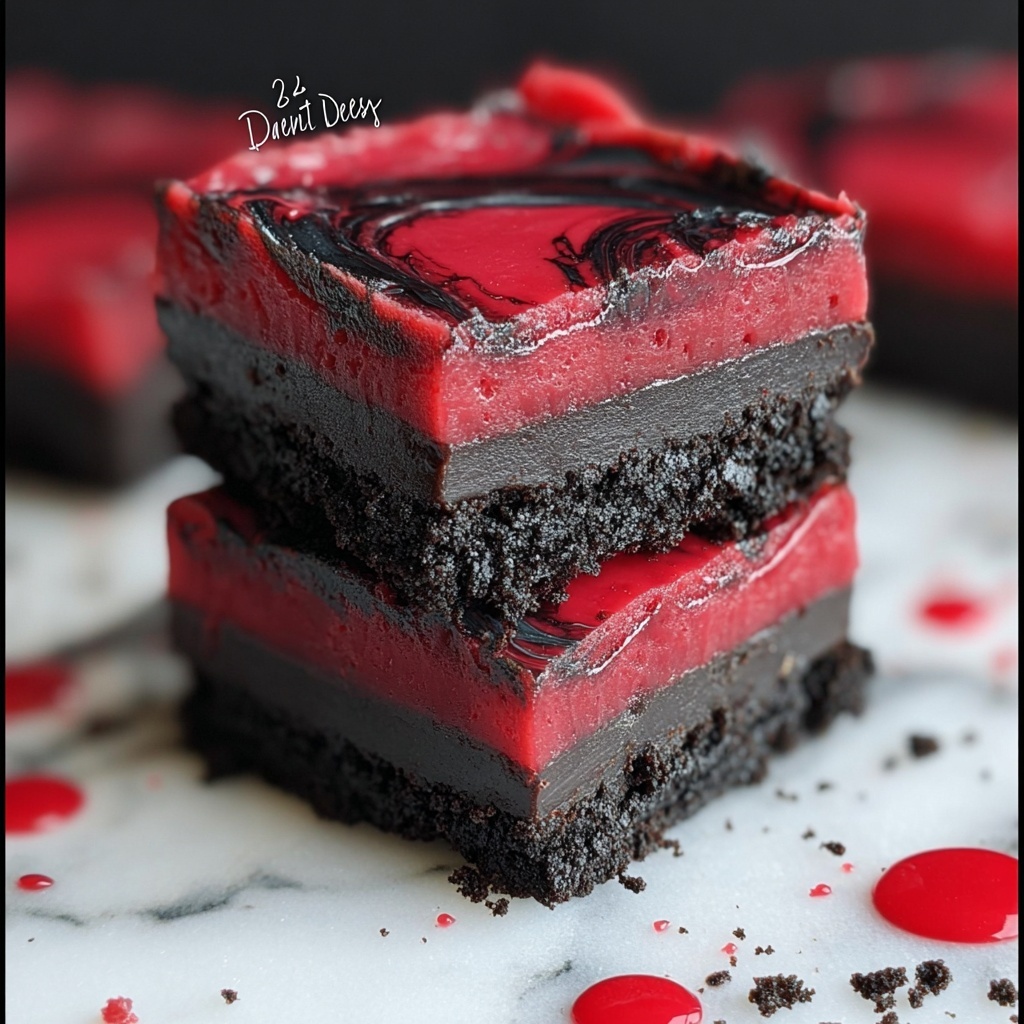
If you’re ready to delight friends and family with a treat that’s as visually captivating as it is delicious, then you absolutely must try this Vampire Fudge: A Spooky Sweet Treat Recipe. Rich, creamy, and boasting a luscious swirl of red-tinted peanut butter that makes every bite feel like a Halloween party in your mouth, this fudge combines smooth chocolate and a sneaky touch of vibrant color to captivate both kids and adults alike. Whether you’re gearing up for a spooky celebration or just craving a unique twist on classic fudge, this recipe is guaranteed to bring a little magic — and a lot of yum — to your dessert table.
Ingredients You’ll Need
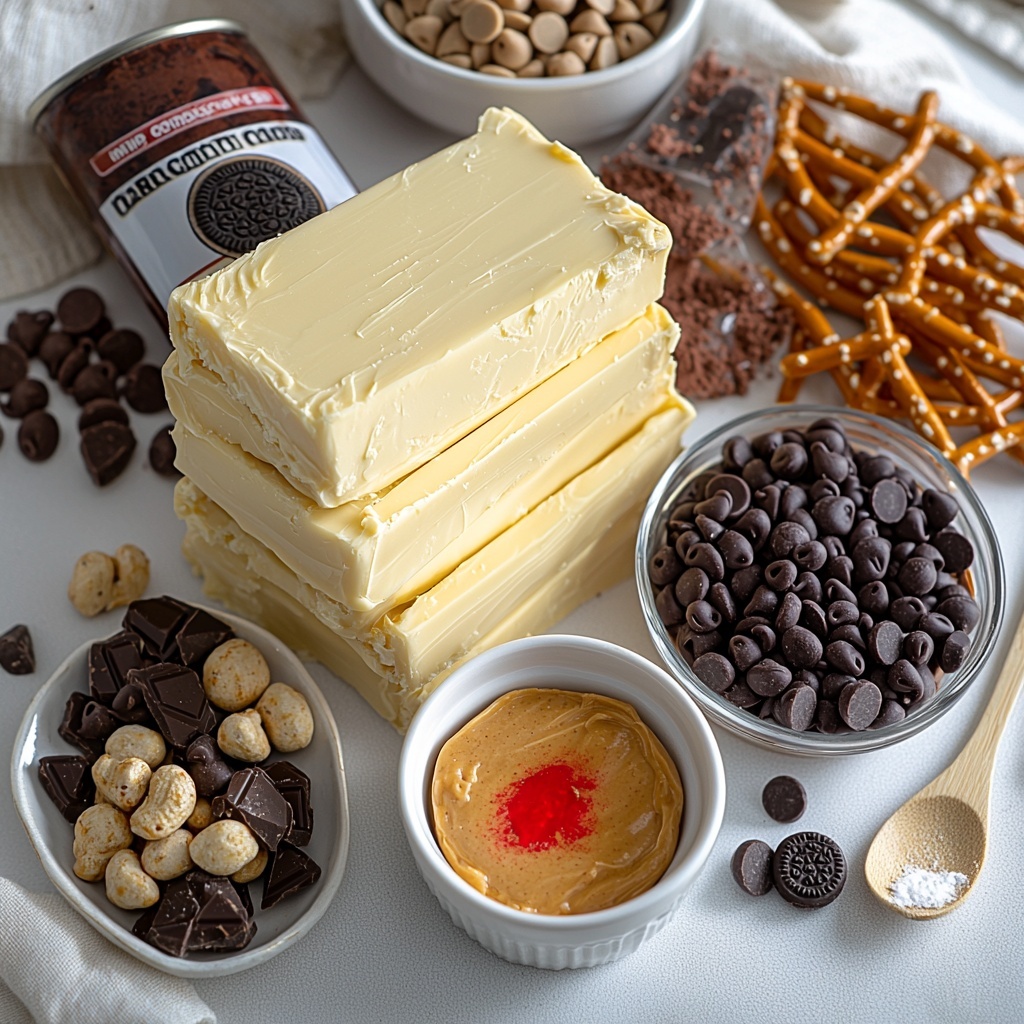
The beauty of Vampire Fudge lies in its elegantly simple ingredient list. Each component plays a key role, whether it’s delivering that silky chocolate base, adding creaminess, or injecting a dramatic pop of red that makes this fudge unforgettable.
- Unsalted butter (1 cup/2 sticks): Provides richness and a velvety texture that melts effortlessly with the chocolate.
- Sweetened condensed milk (14 oz can): Adds creamy sweetness and helps achieve that classic fudge consistency.
- Semi-sweet chocolate chips (12 oz bag): Brings depth and a slight bittersweet counterpoint for balance.
- Milk chocolate chips (12 oz bag): Contributes smooth, milky sweetness to keep every bite luscious.
- Creamy peanut butter (1 cup): Introduces a nutty richness and creaminess that’s the perfect partner to chocolate.
- Vanilla extract (1 tsp): Enhances all the flavors with a subtle, warming complexity.
- Powdered sugar (1/2 cup): Sweetens and thickens the peanut butter swirl for that perfect fudge texture.
- Unsweetened cocoa powder (1/4 cup): Adds a deep chocolate punch and intensifies the color.
- Red food coloring gel (a tiny amount): Just enough to give that dramatic, spooky flair without overwhelming flavor.
- Optional toppings (pretzel sticks, crushed Oreos, chopped nuts): These add a delightful crunch and an extra layer of texture.
How to Make Vampire Fudge: A Spooky Sweet Treat Recipe
Step 1: Prep Your Pan
Start by lining an 8×8 inch baking pan with parchment paper, leaving plenty of overhang on the sides. This little trick makes lifting out your finished fudge smooth and stress-free, helping you get neat, even squares later on.
Step 2: Melt the Butter
In a large saucepan over medium-low heat, melt the butter completely. Stir occasionally to prevent it from browning and ensure even melting—this forms a rich base for your fudge’s creamy texture.
Step 3: Blend Sweetened Condensed Milk
Gradually whisk in the sweetened condensed milk until the mixture is smooth and glossy. This step is key to achieving that perfect fudgy consistency that isn’t too runny or grainy.
Step 4: Add the Chocolate Chips
Pour in both the semi-sweet and milk chocolate chips, stirring constantly. Keep the heat low and keep stirring until all the chocolate has melted into a shiny, uniform mixture that’s ready to delight your taste buds.
Step 5: Stir in Vanilla Extract
Remove the pan from heat and fold in the vanilla extract. This subtle flavor boost deepens the chocolate’s richness and adds a fragrant touch that will have everyone asking what your secret is.
Step 6: Prepare the Peanut Butter Swirl
In a separate bowl, mix the creamy peanut butter with powdered sugar until you have a smooth, spreadable mixture. This swirl adds a luxurious texture and a pop of nutty sweetness that contrasts beautifully with the chocolate.
Step 7: Add the Spooky Red Color
Mix in a tiny touch of red food coloring gel to the peanut butter mixture. The goal here is a visually striking, blood-red swirl that evokes all the spine-tingling fun of Halloween without sacrificing flavor.
Step 8: Assemble the Fudge Layers
Pour half of the chocolate fudge mixture into the prepared pan and spread it evenly. Then spoon dollops of the red peanut butter mixture on top. Use a knife or skewer to gently swirl the peanut butter into the chocolate, creating a beautiful marbled effect.
Step 9: Finish with Chocolate and Optional Toppings
Pour the remaining chocolate mixture over the swirled layer and smooth it out. Now’s the time to sprinkle on your optional toppings—pretzel sticks add crunch and saltiness, crushed Oreos bring texture and a cookie kick, while chopped nuts contribute a satisfying bite.
Step 10: Chill and Cut
Cover the pan tightly with plastic wrap and refrigerate for at least four hours, preferably overnight. This ensures the fudge sets perfectly firm for clean, tidy squares when you lift it out using the parchment paper.
Step 11: Slice and Serve
Use a sharp knife wiped between cuts to slice into small squares. This attention to detail keeps your fudge looking crisp and professional, making your presentation all the more impressive.
How to Serve Vampire Fudge: A Spooky Sweet Treat Recipe
Garnishes
To maximize the Vampire Fudge: A Spooky Sweet Treat Recipe’s eerie and enticing appearance, consider garnishing with Halloween-themed items like edible glitter, crushed candy canes for a festive crunch, or even tiny candy spiders for a fun scare factor. These little finishing touches make your fudge a visual and tasty centerpiece.
Side Dishes
This fudge pairs beautifully with a simple cup of strong coffee or a creamy glass of cold milk, providing a perfect balance to its richness. For a themed party, serve alongside pumpkin-flavored desserts or warm spices to amplify the seasonal vibes.
Creative Ways to Present
Think beyond a traditional platter. Display your Vampire Fudge on a black slate tray or nestled among faux cobwebs for a truly spooky effect. Wrapping individual squares in clear cellophane tied with red ribbons also makes charming party favors that guests will love to take home.
Make Ahead and Storage
Storing Leftovers
If you have leftovers (and with Vampire Fudge: A Spooky Sweet Treat Recipe, that’s often a happy problem), store them in an airtight container in the refrigerator to maintain freshness and firmness. Proper storage will keep your fudge tasting rich and smooth for up to a week.
Freezing
Fudge freezes wonderfully. Wrap individual squares tightly in plastic wrap, then place them in a freezer-safe container or bag. When you’re ready to enjoy, thaw them in the refrigerator overnight for optimal texture and flavor.
Reheating
Generally, fudge is best enjoyed chilled or at room temperature, but if you prefer a softer bite, allow it to sit at room temperature for about 20 minutes before serving. Avoid microwaving, as it can cause the texture to become grainy.
FAQs
Can I substitute nut butter in this recipe?
Absolutely! While creamy peanut butter provides the classic flavor contrast in Vampire Fudge: A Spooky Sweet Treat Recipe, smooth almond or cashew butter can work beautifully and offer a different but equally delicious twist.
Is it possible to make this fudge dairy-free?
This recipe relies on butter and sweetened condensed milk, so to make it dairy-free, you’d need to use plant-based alternatives like vegan butter and sweetened condensed coconut milk. Results may vary slightly in texture and flavor but can still be wonderfully satisfying.
Why is the red food coloring so important?
The red food coloring isn’t just for show—it transforms an ordinary peanut butter swirl into a dramatic, eye-catching feature that brings the “vampire” vibe to life, making this recipe a true spooky sweet treat.
How long does it take for the fudge to set properly?
Although the fudge firm enough to cut in about 4 hours, chilling it overnight is best for perfectly clean slices and optimal texture. Patience pays off deliciously here!
Can I make this recipe bigger or smaller?
Definitely! Just maintain the ratio of ingredients when scaling. Using a larger or smaller pan might require slight adjustments to chilling time to ensure the fudge sets properly.
Final Thoughts
This Vampire Fudge: A Spooky Sweet Treat Recipe is one of those rare desserts that not only tastes incredible but also adds a splash of theatrical fun to any occasion. Whether you’re crafting a Halloween dessert spread or simply indulging your sweet tooth, this fudge will become a favorite to make again and again. Trust me, once you see those bold red swirls and take that first bite, you’ll understand why it’s such a special treat. Go ahead and give it a whirl—you absolutely deserve a little deliciously spooky magic in your kitchen!
Print
Vampire Fudge: A Spooky Sweet Treat Recipe
- Prep Time: 20 minutes
- Cook Time: 15 minutes
- Total Time: 4 hours 35 minutes
- Yield: 16 servings
- Category: Dessert
- Method: Stovetop
- Cuisine: American
Description
Vampire Fudge is a spooky and decadent sweet treat perfect for Halloween or any festive occasion. This layered fudge combines rich chocolate, creamy peanut butter swirled with a hint of red food coloring for a dramatic vampire-themed effect. Topped with optional crunchy pretzels, crushed Oreos, or nuts, this no-bake dessert is delightfully indulgent and sure to impress guests.
Ingredients
Main Ingredients
- 1 cup (2 sticks) unsalted butter
- 1 (14 ounce) can sweetened condensed milk
- 1 (12 ounce) bag semi-sweet chocolate chips
- 1 (12 ounce) bag milk chocolate chips
- 1 cup creamy peanut butter
- 1 teaspoon vanilla extract
- 1/2 cup powdered sugar
- 1/4 cup unsweetened cocoa powder
- Red food coloring gel (a tiny amount, for dramatic effect)
Optional Garnishes
- Pretzel sticks
- Crushed Oreos
- Chopped nuts
Instructions
- Prepare Pan: Line an 8×8 inch baking pan with parchment paper, leaving an overhang on the sides to easily lift the fudge later.
- Melt Butter: In a large saucepan over medium-low heat, melt the unsalted butter completely. Stir occasionally to prevent burning.
- Add Condensed Milk: Gradually whisk in the sweetened condensed milk until fully combined and smooth.
- Melt Chocolate: Add both semi-sweet and milk chocolate chips to the butter mixture. Stir constantly until the chocolate is completely melted and the mixture is glossy.
- Flavor Base: Stir in the vanilla extract to enhance the chocolate flavor.
- Prepare Peanut Butter Mixture: In a separate bowl, mix creamy peanut butter and powdered sugar until smooth and creamy.
- Add Color: Add a tiny amount of red food coloring gel to the peanut butter mixture and stir until evenly colored to create a blood-like effect.
- Layer Chocolate: Pour half of the chocolate mixture into the prepared pan and spread it evenly to form the first layer.
- Add Swirls: Spoon dollops of the red peanut butter mixture over the chocolate layer. Using a knife or skewer, swirl gently to create a marbled pattern.
- Top Layer: Pour the remaining chocolate mixture over the peanut butter swirls, spreading evenly to cover.
- Add Garnishes: Sprinkle optional toppings such as pretzel sticks, crushed Oreos, or chopped nuts over the top for extra texture and flavor.
- Chill to Set: Cover the pan tightly with plastic wrap and refrigerate for at least 4 hours, preferably overnight, to allow the fudge to set firmly.
- Remove Fudge: Use the parchment paper overhang to lift the fudge from the pan easily.
- Cut Squares: Cut the fudge into small squares with a sharp knife, wiping the knife clean between cuts to ensure clean edges.
- Serve: Arrange the squares on a serving platter and serve chilled for best texture and flavor.
Notes
- Ensure to melt the butter and chocolate gently over medium-low heat to prevent scorching the chocolate.
- The red food coloring gel is used sparingly to create a spooky, blood-like effect in the peanut butter layer without altering the flavor.
- For variation, try substituting crunchy peanut butter for extra texture in the swirl layer.
- The fudge keeps well refrigerated in an airtight container for up to one week.
- If you prefer a firmer fudge, chill overnight before cutting and serving.
- Use parchment paper with overhang to lift the fudge easily from the pan without breaking.


