

“`html
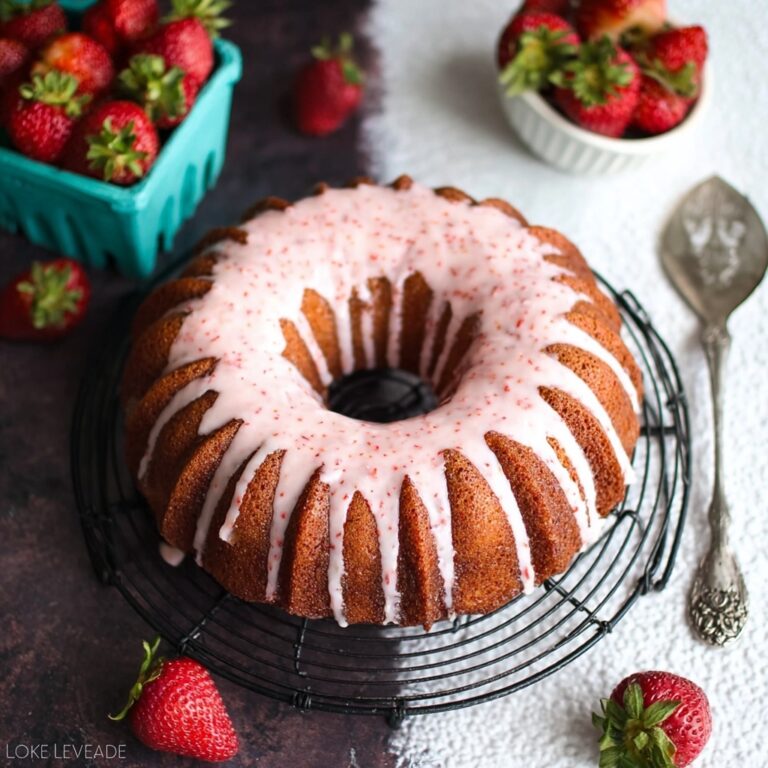
If you’ve ever wanted to taste a nostalgic treat that instantly brings back memories of cozy afternoons and family gatherings, then the Old-Fashioned Pink Jelly Cake Recipe is exactly what you need. This charming dessert combines soft, buttery sponge cakes with a delightfully wobbly strawberry jelly coating, all rolled in coconut and sandwiched with fluffy whipped cream. It’s a visually stunning and irresistibly delicious classic that’s as fun to make as it is to eat.
Ingredients You’ll Need
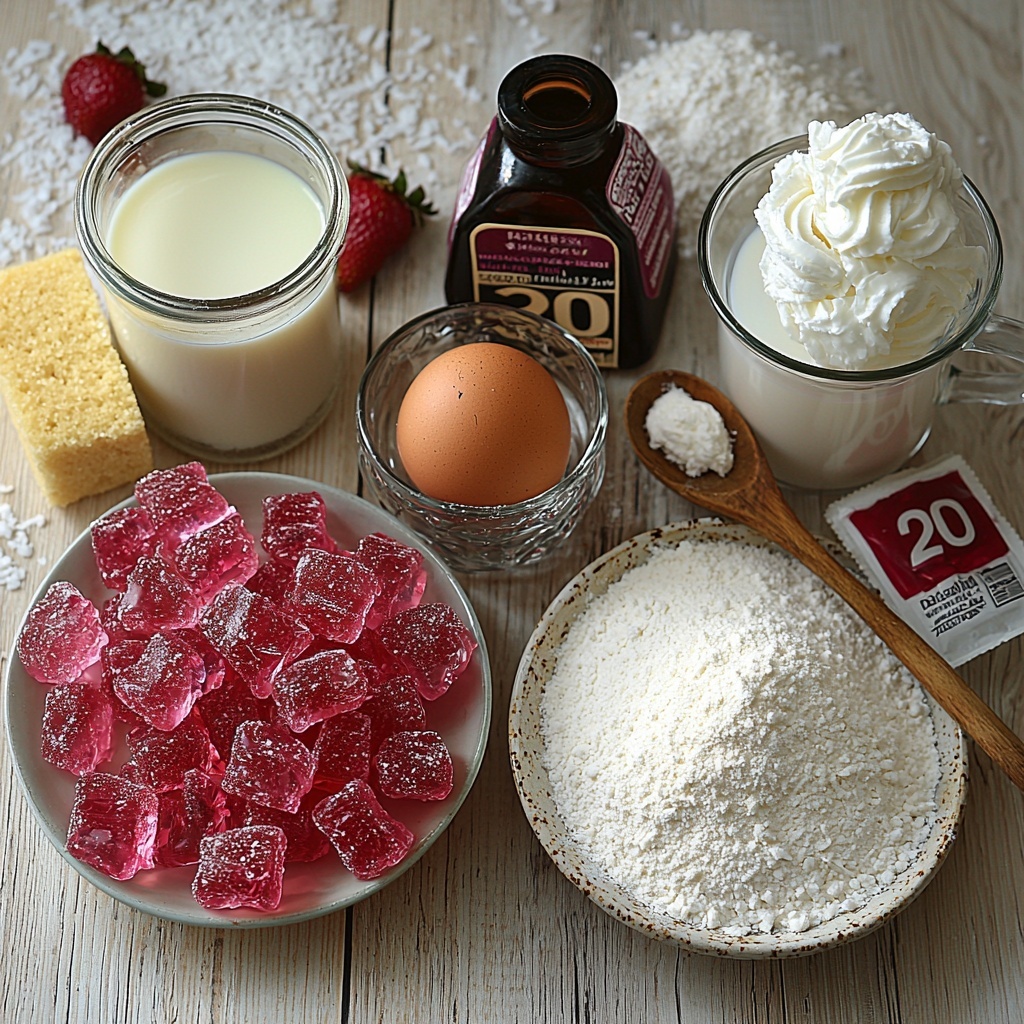
Simple, straightforward ingredients are the secret to the magic of this Old-Fashioned Pink Jelly Cake Recipe. Each element plays a vital role in creating the perfect texture, flavor, and that iconic pink hue.
- 80g butter, softened: Adds richness and helps create a tender crumb in the cake.
- 1/2 cup (110g) caster sugar: Sweetness that melts into the sponge for a light, fluffy base.
- 1 tsp vanilla extract: Brings warmth and depth to the flavor profile.
- 1 egg: Binds the batter together and adds moisture.
- 2/3 cup (160g) milk: Keeps the sponge soft and moist without weighing it down.
- 1 cup (130g) self-raising flour, sifted: Ensures a perfect rise and light texture.
- 85g packet strawberry jelly crystals: Creates the signature vibrant pink jelly that coats the cakes.
- 1 cup (240g) boiling water: Dissolves the jelly crystals for a smooth finish.
- 1 cup (240g) cold water: Helps set the jelly to the ideal consistency for coating.
- 3 1/2 cups (280g) desiccated coconut: Provides a lovely texture and a sweet, nutty flavor that complements the jelly.
- 1 cup (240g) whipped cream: Adds luscious creaminess to the sandwich filling.
How to Make Old-Fashioned Pink Jelly Cake Recipe
Step 1: Prepare the Oven and Pans
First things first, preheat your oven to 175°C (fan-forced) and lightly grease two 12-hole patty-pan tins. This step is key to ensuring your little cakes bake evenly and don’t stick, making them easy to remove later.
Step 2: Make the Cake Batter
In a large bowl, cream together the softened butter, caster sugar, and vanilla extract until the mixture turns pale and fluffy. This fluffy texture is what gives the cakes their lightness. Beat in the egg until it’s fully incorporated, then gently fold in the milk and sifted self-raising flour alternately, in two batches, to form a smooth batter. Be sure not to overmix to keep the cakes tender.
Step 3: Bake the Cakes
Spoon the batter evenly into the prepared patty-pan holes, filling each just below the top to allow room for rising. Pop them into the oven and bake for 15 to 18 minutes, or until the tops are golden and a skewer inserted comes out clean. Once baked, let the cakes cool in the pans for 5 minutes before transferring them to a wire rack to cool completely. This cooling step prevents the jelly from melting when applied.
Step 4: Prepare the Pink Jelly
While the cakes cool, dissolve the strawberry jelly crystals in boiling water, stirring until completely dissolved. Add the cold water and stir again. Refrigerate this mixture for 1 to 2 hours until it is partially set. This perfect jelly consistency will cling beautifully to the cakes without dripping off.
Step 5: Coat Cakes with Jelly and Coconut
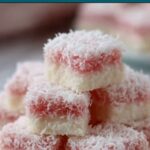
Once the jelly is ready and cakes are cooled, dip each cake into the jelly using a slotted spoon, letting excess drip off. Immediately roll the jelly-coated cake in desiccated coconut to cover every inch. The coconut not only adds texture and flavor but also helps keep the jelly in place.
Step 6: Assemble the Cake Sandwiches
Spoon whipped cream onto one coconut-coated cake half and sandwich it with another. These little cakes transform into delightful pink jelly cream sandwiches! Finally, refrigerate the assembled cakes for 30 minutes to firm up before serving.
How to Serve Old-Fashioned Pink Jelly Cake Recipe
Garnishes
For an elegant touch, dust the tops of the jelly cakes lightly with icing sugar or fresh strawberry slices. You can also add a small sprig of mint for a fresh contrast that brightens the presentation beautifully.
Side Dishes
This Old-Fashioned Pink Jelly Cake Recipe pairs wonderfully with a simple cup of tea or coffee, making it a perfect afternoon treat. For a more indulgent experience, serve alongside fresh berries or a fruit compote to add more natural sweetness and color.
Creative Ways to Present
Try arranging the jelly cakes on a vintage cake stand for a charming vibe or serve them in individual cupcake liners to make sharing easier and mess-free. You can also stack them in tiers for a playful, eye-catching dessert centerpiece at your next gathering.
Make Ahead and Storage
Storing Leftovers
Once assembled and refrigerated, these pink jelly cakes can be stored in an airtight container in the fridge for 3 to 4 days. Keeping them chilled ensures the jelly retains its perfect wobble and the cream stays fresh, making every bite just as delightful as the first.
Freezing
Because of the delicate jelly and whipped cream, freezing is not recommended for the finished cakes as it can alter the texture significantly. However, you can freeze the baked cake layers (without jelly or cream) for up to one month and prepare the jelly and assembly fresh when ready.
Reheating
This dessert is best enjoyed chilled, so reheating is not advised. If you prefer your cake at room temperature, remove it from the fridge about 15 minutes before serving to take the chill off without affecting the jelly’s consistency.
FAQs
Can I use different flavors of jelly in this Old-Fashioned Pink Jelly Cake Recipe?
Absolutely! While strawberry jelly is traditional and gives that iconic pink hue, you can experiment with raspberry, cherry, or even mixed berry flavors for a delicious twist. Just keep in mind that the flavor you choose will influence the overall taste and color of the cake.
What if I don’t have a patty-pan tin? Can I use a different baking pan?
Yes, you can use mini muffin tins or any small baking molds that hold the batter in individual portions. Just watch your baking time closely, as it might vary slightly depending on the size and shape of the pan you use.
Is there a way to make the jelly set faster?
Placing the jelly mixture in the fridge helps it set evenly, but you can speed up the process slightly by spreading it out in a shallow dish or putting the container in a cool water bath before refrigerating. Patience is key, though—wait until it’s partially set before dipping the cakes to avoid a runny coating.
Can I prepare the cakes a day ahead of time?
Yes! You can bake the cakes and prepare the jelly the day before assembling. Keep the cakes well covered at room temperature or in the fridge, and make sure the jelly is refrigerated until needed. Assemble and refrigerate them about 30 minutes before serving for the best results.
How do I prevent the jelly from dripping off the cakes?
The jelly needs to be partially set—not too runny or fully firm—for it to cling nicely to the cakes. Using a slotted spoon to dip and then letting the excess drip off helps, and rolling the cakes quickly in desiccated coconut seals the jelly in place perfectly.
Final Thoughts
This Old-Fashioned Pink Jelly Cake Recipe is with no doubt a charming classic that brings joy to any occasion. Its nostalgic flavors and whimsical appearance make it a true crowd-pleaser, and best of all, it’s simple enough to whip up with familiar pantry staples. So go ahead, take a trip down memory lane, and enjoy the sweet, coconut-clad fun of this delightful treat—you won’t regret it!
“`
Print
Old-Fashioned Pink Jelly Cake Recipe
- Prep Time: 30 minutes
- Cook Time: 18 minutes
- Total Time: 1 hour 30 minutes
- Yield: 12 servings
- Category: Dessert
- Method: Baking
- Cuisine: Western
Description
This nostalgic Old-Fashioned Pink Jelly Cake features soft sponge cakes dipped in strawberry jelly and rolled in coconut, then sandwiched with whipped cream. It’s a delightful treat combining fluffy cake, fruity jelly, and creamy filling for a refreshing and visually appealing dessert.
Ingredients
Cake Batter
- 80g butter, softened
- 1/2 cup (110g) caster sugar
- 1 tsp vanilla extract
- 1 egg
- 2/3 cup (160g) milk
- 1 cup (130g) self-raising flour, sifted
Jelly
- 85g packet strawberry jelly crystals
- 1 cup (240g) boiling water
- 1 cup (240g) cold water
Coating and Filling
- 3 1/2 cups (280g) desiccated coconut
- 1 cup (240g) whipped cream
Instructions
- Preheat Oven: Preheat your oven to 175°C (fan-forced) ensuring it reaches the right temperature for even baking.
- Prepare Tin: Lightly grease two 12-hole patty-pan tins to prevent the cakes from sticking during baking.
- Cream Butter and Sugar: In a large bowl, cream together softened butter, caster sugar, and vanilla extract until the mixture is pale and fluffy to incorporate air for a light texture.
- Add Egg: Add the egg and beat it in thoroughly to combine it smoothly with the creamed mixture.
- Fold in Milk and Flour: Gently fold in the milk and sifted self-raising flour alternately in two batches, taking care not to overmix to keep the batter airy.
- Fill Patty-Pan Holes: Spoon the batter evenly into the prepared patty-pan holes, filling each just below the top to allow for rising.
- Bake Cakes: Bake in the preheated oven for 15–18 minutes or until golden and a skewer inserted comes out clean, indicating doneness.
- Cool Cakes: Let the cakes cool in the tin for 5 minutes to firm up, then transfer to a wire rack to cool completely, preparing them for the jelly coating.
- Prepare Jelly: Dissolve the strawberry jelly crystals in boiling water, stir in cold water, and refrigerate until partially set, about 1–2 hours, creating a thick jelly for coating.
- Dip Cakes in Jelly: Using a slotted spoon, dip each cooled cake into the jelly mixture, allowing excess jelly to drip off for an even coat.
- Roll in Coconut: Roll each jelly-coated cake in desiccated coconut to get a sticky, textured and flavorful outer layer.
- Assemble Cakes: Spoon whipped cream onto one half of a jelly-coated cake, then sandwich it with another half to create the layered finished treat.
- Chill Before Serving: Refrigerate the assembled cakes for 30 minutes to set the cream and enrich the flavors before serving.
Notes
- Ensure the jelly is only partially set before dipping cakes to achieve a good coating without the jelly being too liquid or too firm.
- The whipped cream filling can be sweetened slightly if desired for extra sweetness.
- Serve chilled for best texture and flavor contrast.
- Use self-raising flour to avoid the need for additional leavening agents.

