Description
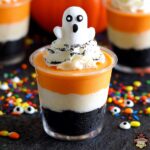
These No-Bake Halloween Cheesecake Cups are a festive and easy-to-make dessert perfect for Halloween parties. Featuring layers of colorful orange and purple creamy cheesecake atop a chocolate cookie crumb crust, these cups are both visually striking and delicious. No baking required, they set in the refrigerator making them a quick and simple treat that delights kids and adults alike.
Ingredients
Scale
Crust
- 1 1/2 cups chocolate sandwich cookie crumbs
- 4 tablespoons unsalted butter, melted
Filling
- 16 ounces cream cheese, softened
- 3/4 cup powdered sugar
- 1 teaspoon vanilla extract
- 1 cup heavy whipping cream, cold
- Orange gel food coloring
- Purple gel food coloring
Topping (Optional)
- Halloween sprinkles or candy eyes
Instructions
- Prepare the crust: In a medium bowl, combine the chocolate cookie crumbs with the melted butter and mix until evenly incorporated. Spoon about 2 tablespoons of this mixture into the bottom of each small serving cup and press down firmly to form a solid crust layer.
- Make the cheesecake base: In a large bowl, beat the softened cream cheese until smooth and creamy. Add the powdered sugar and vanilla extract, then mix thoroughly until fully combined and silky.
- Whip the cream: In a separate bowl, whip the cold heavy cream to stiff peaks, ensuring it holds firm shapes without collapsing.
- Combine whipped cream and cream cheese: Gently fold the whipped cream into the cream cheese mixture carefully to maintain a light and fluffy texture without deflating the airiness.
- Color the cheesecake filling: Divide the filling evenly into two separate bowls. Tint one bowl with orange gel food coloring and the other with purple gel food coloring, blending until the colors are uniform and vibrant.
- Assemble the layers: Spoon or pipe alternating layers of the orange and purple cheesecake filling over the prepared chocolate crusts in the serving cups. Smooth the tops with a spatula for an even finish.
- Decorate and chill: Add Halloween sprinkles or candy eyes on top if desired for extra festive flair. Refrigerate the assembled cups for at least 2 hours to allow them to set before serving.
Notes
- Use clear plastic cups to showcase the colorful layered cheesecake for a fun presentation.
- For easier piping, transfer the cheesecake mixtures into zip-top bags and snip a corner to pipe neat layers.
- These cheesecake cups can be prepared up to 24 hours in advance and stored refrigerated to save time on party day.
