
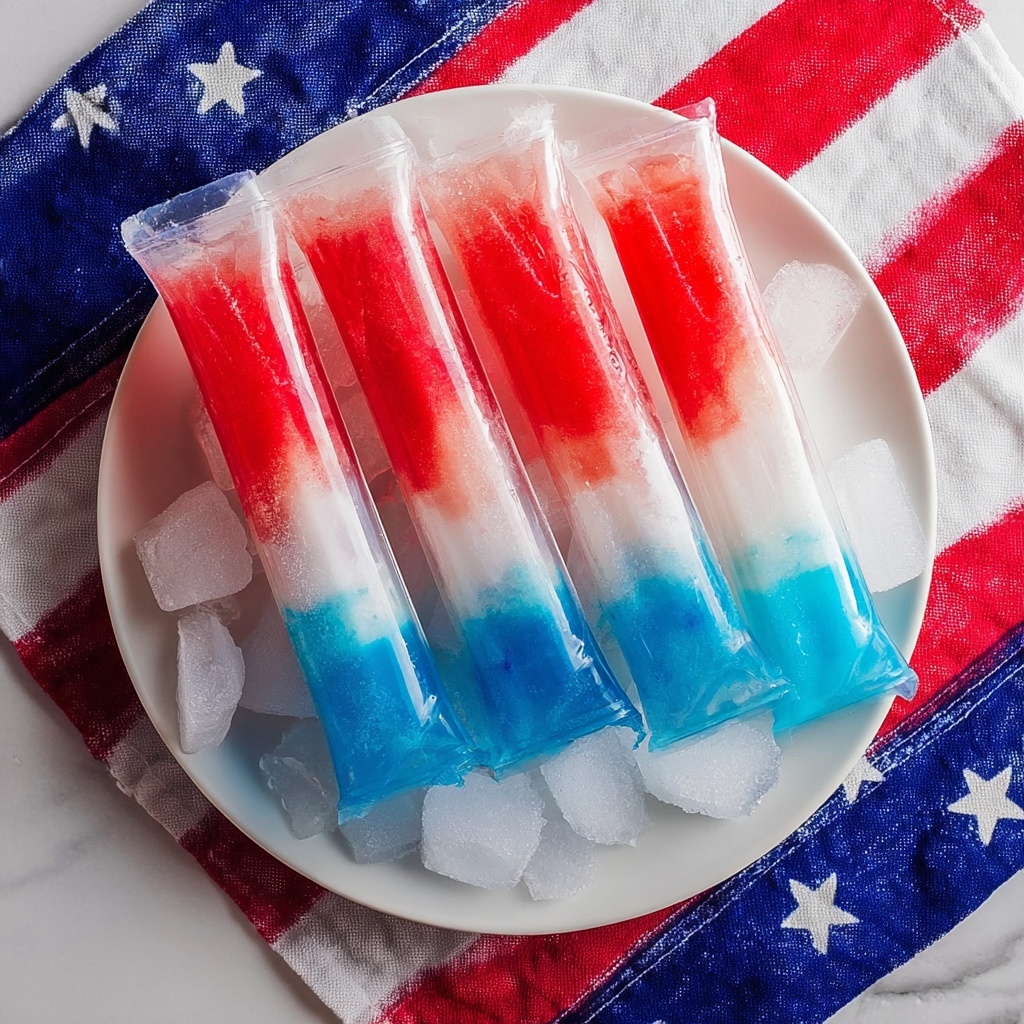
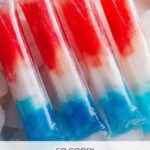
If you’re craving a nostalgic treat that perfectly captures the fun and flavor of summer, you’re going to love this Homemade Bomb Pops Recipe. With its striking red, white, and blue layers, these popsicles are not just a feast for the eyes but a refreshing burst of fruity goodness in every bite. Plus, they’re super simple to make at home using just a few essential juices that come together to create that classic patriotic taste we all adore. Whether you’re planning a Fourth of July party, a fun family day, or just want a colorful cool-down snack, this recipe is your go-to for a delightful frozen indulgence.
Ingredients You’ll Need
This Homemade Bomb Pops Recipe relies on just three simple juice ingredients that each play a vital role in delivering the iconic colors and flavors. Each brings a unique brightness and sweetness to the pops, ensuring every layer tastes as good as it looks.
- Blue Hawaiian punch, blue Kool Aid, or blue sports drink: Provides the vibrant blue base and a refreshing berry flavor that’s both sweet and tangy.
- Lemonade (or a mix of water and white grape juice): Offers the creamy white middle layer with a light, citrusy zing that balances the sweetness of the other layers.
- Red Hawaiian punch, cherry juice, or fruit punch: Creates the bold, fruity red top layer packed with rich cherry or berry notes for a delicious finish.
How to Make Homemade Bomb Pops Recipe
Step 1: Create the Blue Layer
Start by pouring about 1 to 2 tablespoons of your chosen blue juice into each popsicle pouch, filling each around one-third full. Then, freeze these for about 30 to 45 minutes until they are firm enough to hold the next layer but not completely solid. This step is key to achieving the distinct layered look that makes the bomb pop so eye-catching.
Step 2: Add the White Layer
Next, pour 1 to 2 tablespoons of lemonade or your white juice mix gently over the frozen blue layer, again filling the pouch about one-third full. Return the popsicles to the freezer and leave them for another 30 to 45 minutes. The contrast between the tart lemonade and sweet blue juice makes this layer stand out both visually and in flavor.
Step 3: Top with the Red Layer
Finally, pour 1 to 2 tablespoons of the red juice over the now-set white layer, filling the popsicle molds to the top. Freeze the entire popsicle for 4 to 6 hours or until completely solid. This last step seals in the vibrant colors and locks in the delicious trio of flavors.
Step 4: Remove and Enjoy
Once frozen solid, run the popsicle molds under warm water for a few seconds to loosen the edges and easily remove your beautiful, layered bomb pops. Now you’re ready to enjoy a nostalgic, refreshing treat that’s sure to bring a smile to everyone.
How to Serve Homemade Bomb Pops Recipe
Garnishes
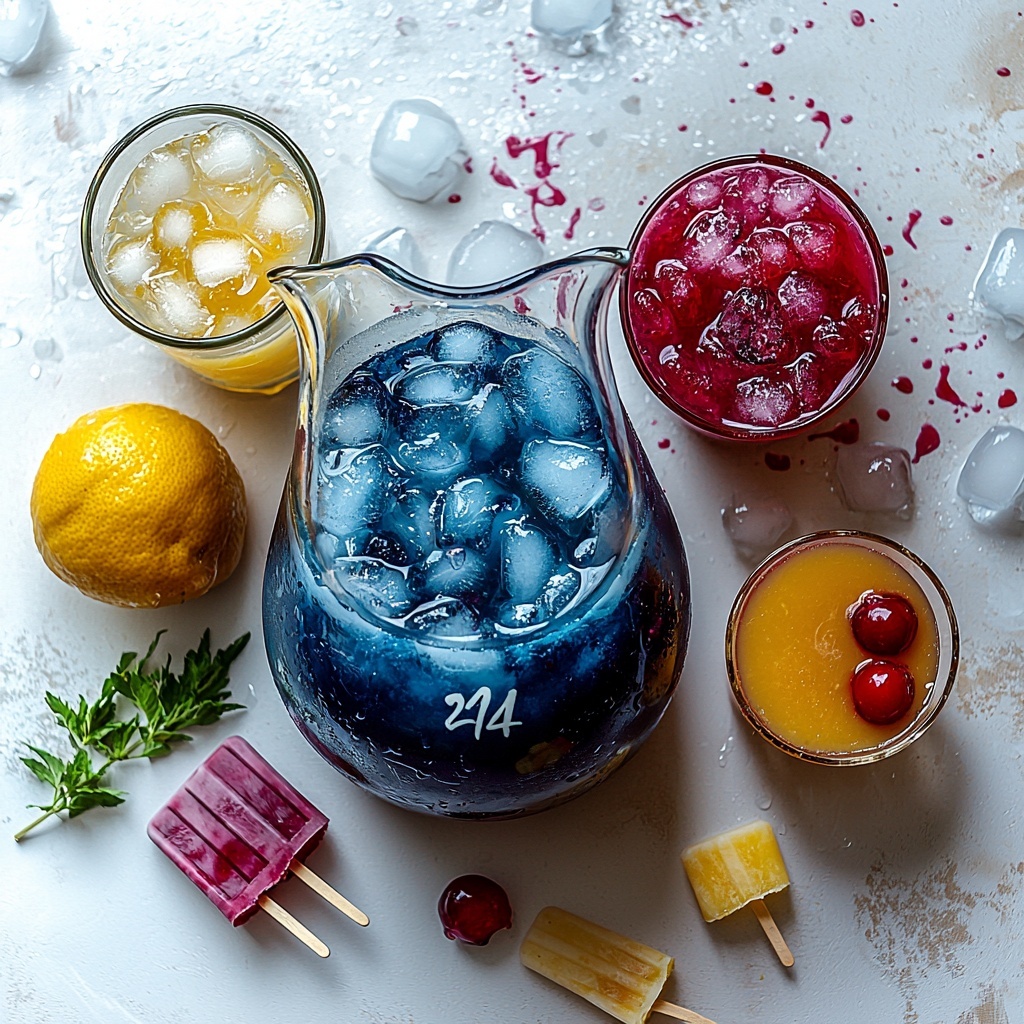
While these popsicles are stunning just as they are, you can add a little extra flair by serving them with a sprinkle of edible glitter or a dash of shredded coconut around the base for a fun, festive touch. Fresh berries on the side can also complement the fruity flavors beautifully.
Side Dishes
For a perfect summer snack, pair your Homemade Bomb Pops Recipe with light and fresh sides like watermelon slices, crisp cucumber salad, or a bowl of mixed berries. These refreshing accompaniments keep the vibe cool and healthy.
Creative Ways to Present
Want to impress your guests? Serve your bomb pops in clear plastic cups filled with crushed ice or colorful sprinkles. Another cute idea is placing them upright in a bed of sliced lemons and limes on a serving tray to highlight their patriotic colors and add a zing of fresh citrus aroma.
Make Ahead and Storage
Storing Leftovers
If you end up with extra bomb pops, keep them stored in the freezer in an airtight container or a resealable plastic bag to preserve their flavor and prevent freezer burn. They should stay delicious for up to two weeks.
Freezing
To ensure your pops freeze evenly and maintain those perfect, distinct layers, it’s essential to follow the freezing times between layers diligently. Make sure your freezer is set to a sufficiently cold temperature before starting so the juice freezes quickly and cleanly.
Reheating
Frozen treats like these bomb pops are best enjoyed chilled and don’t require reheating. Simply let them sit at room temperature for a few minutes if they’re too hard to enjoy immediately, then savor the cool, fruity refreshment.
FAQs
Can I substitute the juices with healthier alternatives?
Absolutely! You can use 100% natural fruit juices without added sugars or even homemade fruit purees diluted with a bit of water to keep that light, ice-pop texture while making the recipe a bit healthier.
How long does it take to freeze each layer properly?
Each layer should freeze for about 30 to 45 minutes until it’s firm enough to support the next layer without mixing. The final red layer needs about 4 to 6 hours to freeze solid. Patience here is the secret to those perfect layers!
Can I make these without special popsicle molds?
If you don’t have popsicle pouches or molds, small paper cups and popsicle sticks work wonderfully. Just be sure to cover them loosely with foil to hold the sticks upright during freezing.
What can I do if my layers bleed together?
This happens if you don’t freeze the layers long enough before adding the next one. Make sure each layer is partially or fully frozen before pouring the next juice on top to keep the colors sharp and distinct.
Are these popsicles kid-friendly?
Definitely! This Homemade Bomb Pops Recipe is a fun, colorful treat that kids will love making with you and eating. Just be mindful of the sugar content in store-bought juices if you want to keep it extra healthy for little ones.
Final Thoughts
Making this Homemade Bomb Pops Recipe is like capturing a little summer magic right in your own freezer. The ease of preparation combined with the vibrant, layered colors and refreshing flavors make it an instant classic. I truly hope you give this fun recipe a try and create many joyful memories around it with friends and family. Nothing beats the simple delight of enjoying a homemade treat that tastes amazing and looks spectacular.
Print
Homemade Bomb Pops Recipe
- Prep Time: 10 minutes
- Cook Time: 4 hours 30 minutes
- Total Time: 4 hours 40 minutes
- Yield: 14 popsicles
- Category: Dessert
- Method: No-Cook
- Cuisine: American
Description
Homemade Bomb Pops are patriotic, layered popsicles made with refreshing blue, white, and red juices, perfect for hot summer days or festive celebrations. This easy no-cook recipe involves freezing layers of blue Hawaiian punch, lemonade, and red fruit punch sequentially to create a delicious and colorful treat.
Ingredients
Blue Layer
- 1 cup blue Hawaiian punch, blue Kool Aid, or blue sports drink
White Layer
- 1 cup lemonade (or a mix of water and white grape juice)
Red Layer
- 1 cup red Hawaiian punch, cherry juice, or fruit punch
Instructions
- Blue Layer: Pour 1-2 tablespoons of the blue juice into each popsicle pouch, filling about one-third full. Place the pouches in the freezer and freeze for 30-45 minutes until the layer is slightly firm but not fully frozen, which helps the layers stick together.
- White Layer: Carefully pour 1-2 tablespoons of lemonade over the slightly frozen blue layer, filling another one-third of the popsicle pouch. Return the pouches to the freezer and freeze for another 30-45 minutes until this layer is also firm enough for layering.
- Red Layer: Pour 1-2 tablespoons of red juice over the frozen white and blue layers, filling the mold to the top. Freeze the pouches for at least 4-6 hours or until fully solid to ensure the popsicles are completely frozen through.
- Unmolding: When ready to serve, briefly run the mold under warm water for a few seconds to loosen the popsicles, then gently remove them from the pouches to enjoy your homemade Bomb Pops.
Notes
- Use a variety of blue and red juices according to your preference for different flavor profiles.
- Make sure each layer is partially or fully frozen before adding the next one to maintain distinct layers.
- Freezing times may vary depending on your freezer, so adjust as needed.
- Running warm water briefly on the molds helps remove the popsicles easily without melting them.
- For a natural alternative, consider using fruit juices without added sugars.


