
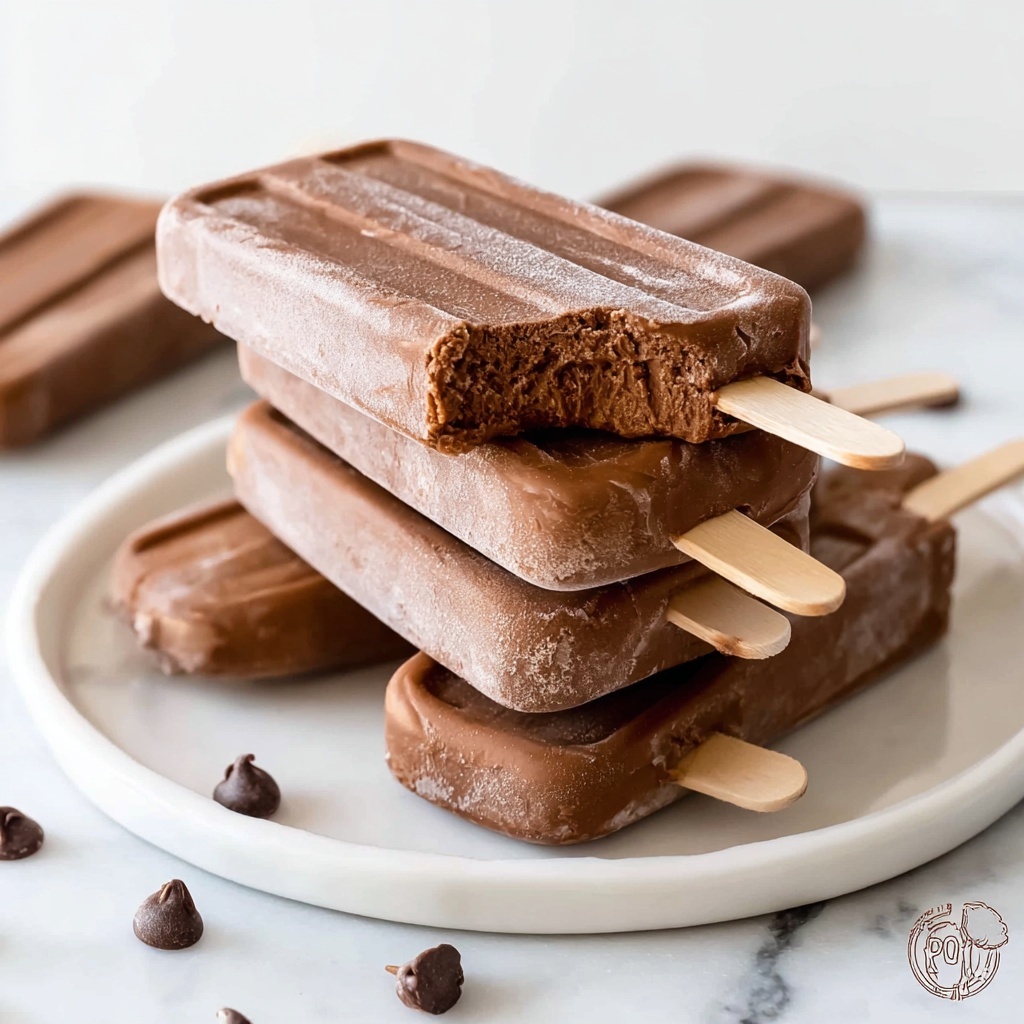
If you’re looking for a guilt-free treat that feels like dessert but fuels your body right, this Healthy Banana Chocolate Fudgesicles Recipe is an absolute game-changer. Combining naturally sweet bananas with rich cocoa and creamy Greek yogurt, these fudgesicles strike the perfect balance of indulgence and nutrition. They’re smooth, chocolaty, and refreshing—a perfect way to cool down on a warm day while sneaking in some wholesome ingredients that everyone will love.

Ingredients You’ll Need
These ingredients are wonderfully simple but essential for creating the perfect texture, taste, and color in your fudgesicles. Each component brings something special—from the natural sweetness of the bananas to the velvety chocolate flavor of cocoa powder, everything works in harmony.
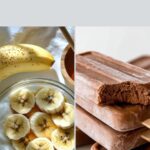
- 2 ripe bananas: Naturally sweet and creamy, ripe bananas give your fudgesicles a smooth texture and essential sweetness.
- 1 cup Greek yogurt (plain or flavored): Adds protein and creaminess, making the fudgesicles satisfying and luscious.
- 1/2 cup unsweetened cocoa powder: Provides that rich, deep chocolate flavor without added sugar.
- 1/4 cup honey or maple syrup: A natural sweetener to enhance the taste—adjust to your preferred level of sweetness.
- 1 teaspoon vanilla extract: Brings warmth and depth to the chocolate flavor.
- A pinch of salt: Balances and intensifies the chocolate and banana flavors perfectly.
- Optional: 1/4 cup nut butter (peanut, almond, or cashew): Add creaminess and a subtle nutty note for an extra indulgent touch.
How to Make Healthy Banana Chocolate Fudgesicles Recipe
Step 1: Prepare Ingredients
Start by gathering all your ingredients. It’s important that your bananas are fully ripe, as this ensures maximum natural sweetness and a smooth texture for your fudgesicles. Having everything ready at your workspace makes blending quick and easy.
Step 2: Blend Mixture
In a blender or food processor, combine the ripe bananas, Greek yogurt, unsweetened cocoa powder, honey or maple syrup, vanilla extract, and a pinch of salt. Whirl everything together until the mixture is silky smooth and creamy—no pesky lumps allowed!
Step 3: Add Nut Butter (Optional)
If you’re adding nut butter, now’s the time. Pour it into your blended mixture and pop it back into the blender for a few more seconds until it’s fully incorporated. This gives the fudgesicles an extra layer of richness and a subtle nutty flavor that’s nothing short of delicious.
Step 4: Taste and Adjust
Give your fudgesicle batter a quick taste test. If you want it sweeter, add a little more honey or maple syrup and blend again. This step is key to finding the perfect balance that suits your palate.
Step 5: Pour into Molds
Carefully pour the mixture into your popsicle molds, filling them about three-quarters full. Leaving a little space is important because the mixture will expand slightly when it freezes.
Step 6: Insert Sticks
If your molds require sticks, insert them now, making sure they’re centered so the fudgesicles freeze evenly.
Step 7: Freeze
Place the molds in the freezer and let them chill for at least four to six hours. For best results, freezing overnight allows the fudgesicles to set completely, making them easier to unmold and enjoy.
Step 8: Remove and Enjoy
To get your fudgesicles out easily, run warm water over the outside of the molds for a few seconds. Gently pull the fudgesicles out, then dig in! The smooth, chocolaty flavor combined with the fresh banana makes every bite truly delightful.
How to Serve Healthy Banana Chocolate Fudgesicles Recipe
Garnishes
While these fudgesicles are incredibly tasty on their own, garnishing adds an exciting touch. Consider topping them with a sprinkle of cacao nibs for crunch, a drizzle of melted dark chocolate for extra indulgence, or a dusting of shredded coconut to highlight those tropical banana notes.
Side Dishes
For a fun and nutritious snack, serve these Healthy Banana Chocolate Fudgesicles alongside a fresh fruit salad or crunchy granola. The contrast of textures and flavors will make the whole experience pop and keep things balanced.
Creative Ways to Present
Want to impress your friends? Serve these fudgesicles in a chilled glass or jar with a colorful napkin. Another idea is to dip them halfway into melted chocolate and roll them in chopped nuts or crushed freeze-dried fruit before freezing completely, creating a decadent coating that’s sure to wow.
Make Ahead and Storage
Storing Leftovers
If you have any fudgesicles left over, keep them in an airtight container or tightly sealed popsicle bag in the freezer to prevent freezer burn. They will stay fresh and tasty for up to two weeks, making for a quick grab-and-go treat anytime.
Freezing
The bulk of the work here involves freezing. After preparing your mixture and filling the molds, just give it ample time in the freezer (4-6 hours or overnight) for that perfect fudgy texture. Avoid opening the freezer frequently to maintain consistent temperature and best results.
Reheating
Since these fudgesicles are frozen treats, reheating is not recommended. Instead, to soften them gently before eating, simply let them sit at room temperature for a few minutes, or run warm water over the mold exterior briefly to loosen them up for easy removal.
FAQs
Can I use regular yogurt instead of Greek yogurt?
Absolutely! Regular yogurt works fine, but Greek yogurt adds extra creaminess and protein, which improves both texture and nutritional value.
Are there alternatives to honey or maple syrup?
Yes, you can use agave nectar, date syrup, or even a bit of stevia for a lower-calorie option. Just be mindful of the sweetness level as some alternatives are sweeter than others.
Can I make these fudgesicles vegan?
Definitely! Use a dairy-free yogurt like coconut or almond yogurt and opt for maple syrup instead of honey. The results are just as delicious and creamy.
How ripe should the bananas be?
Choose bananas that are very ripe, with plenty of brown spots. They are sweeter and blend into a smoother, more flavorful fudgesicle base.
Can I add mix-ins like chocolate chips or nuts?
Yes! For extra texture, gently fold in mini chocolate chips or chopped nuts after blending, then pour into molds. Just be sure to freeze immediately so everything sets nicely.
Final Thoughts
There’s something magical about making your own treats that are both delicious and good for you, and this Healthy Banana Chocolate Fudgesicles Recipe nails it. It’s simple, quick, and perfect for anyone craving a refreshing dessert that satisfies without guilt. Give it a try—you might just find yourself making these fudgesicles on repeat!
Print
Healthy Banana Chocolate Fudgesicles Recipe
- Prep Time: 10 minutes
- Cook Time: 0 minutes
- Total Time: 4 hours 10 minutes to 6 hours 10 minutes (including freezing)
- Yield: 6 fudgesicles
- Category: Dessert
- Method: Blending
- Cuisine: American
- Diet: Vegetarian
Description
Healthy Fudgesicles are a delicious and nutritious frozen treat made with ripe bananas, creamy Greek yogurt, cocoa powder, and a touch of natural sweetener. These fudgesicles are dairy-rich, packed with protein, and easy to make with simple ingredients blended together and frozen to perfection, making them a wholesome alternative to store-bought ice cream pops.
Ingredients
Main Ingredients
- 2 ripe bananas
- 1 cup Greek yogurt (plain or flavored)
- 1/2 cup unsweetened cocoa powder
- 1/4 cup honey or maple syrup (adjust for desired sweetness)
- 1 teaspoon vanilla extract
- A pinch of salt
Optional Add-ins
- 1/4 cup nut butter (peanut, almond, or cashew)
Instructions
- Prepare Ingredients: Start by gathering all your ingredients. Ensure the bananas are ripe to enhance the natural sweetness of the fudgesicles.
- Blend Mixture: In a blender or food processor, combine the ripe bananas, Greek yogurt, unsweetened cocoa powder, honey or maple syrup, vanilla extract, and a pinch of salt. Blend until the mixture is smooth and creamy without any lumps.
- Add Nut Butter: If you choose to include nut butter, add it now to the blender and blend again until it is fully incorporated and the mixture is evenly combined.
- Taste and Adjust: Sample the mixture to check sweetness and flavor. Add a little more honey or maple syrup if you prefer a sweeter fudgesicle and blend briefly to mix.
- Pour into Molds: Carefully pour the blended mixture into your popsicle molds, filling each mold about three-quarters full to allow room for expansion during freezing.
- Insert Sticks: Place the popsicle sticks into the molds if they require them before freezing.
- Freeze: Position the molds in the freezer and allow the fudgesicles to freeze solid for at least 4 to 6 hours, or preferably overnight for the best texture.
- Remove and Enjoy: To unmold, run warm water over the outside of the molds for a few seconds to loosen the fudgesicles, then gently pull them out. Serve immediately and enjoy your healthy frozen treat!
Notes
- Use ripe bananas for natural sweetness and creaminess.
- Adjust the sweetness with honey or maple syrup according to your taste preference.
- Nut butter is optional but adds creaminess and healthy fats.
- Allow sufficient freezing time to ensure the fudgesicles set properly.
- To unmold easily, briefly run warm water on the outside of the molds.
- These fudgesicles are a great healthy dessert or snack option, suitable for kids and adults alike.
- Store extra fudgesicles in the freezer in an airtight container for up to 1 week.