
“`html
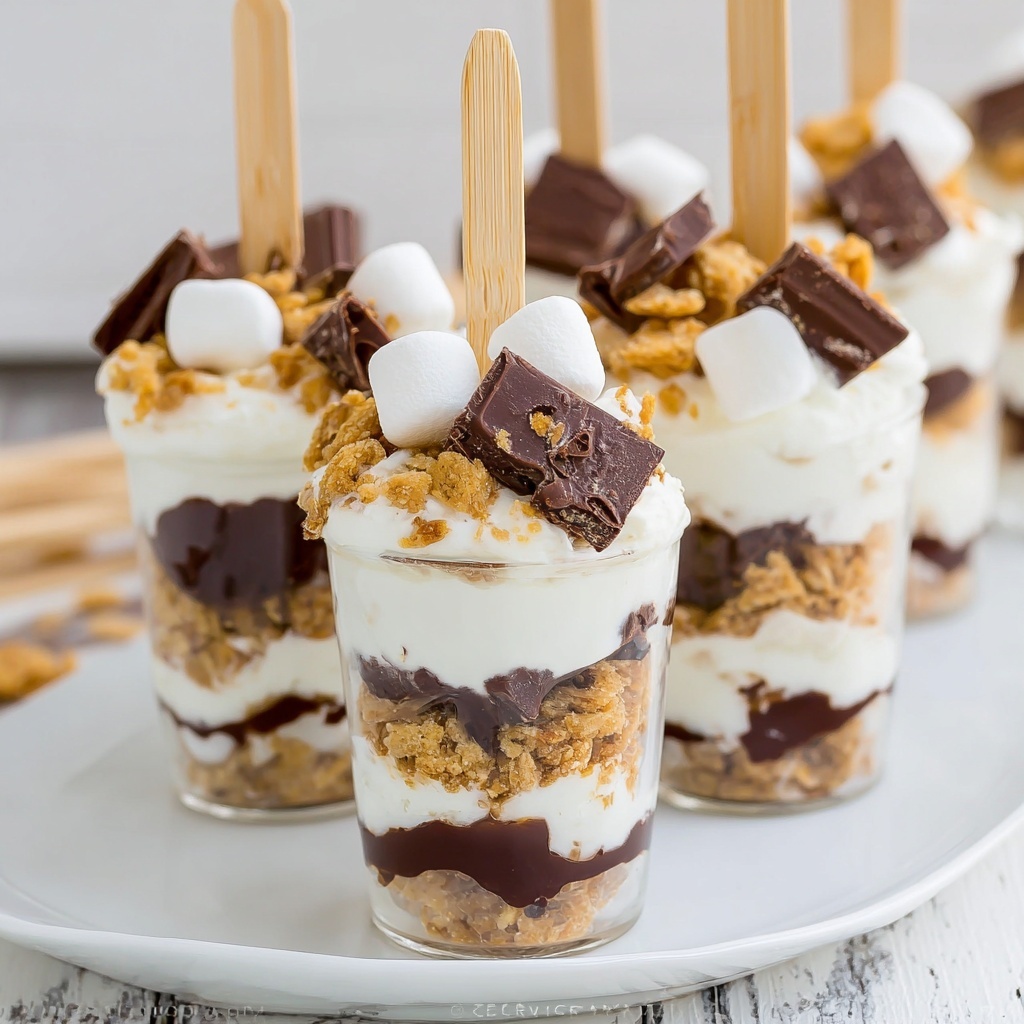
If you are craving a fun and nostalgic twist on a classic campfire treat, the Layered S’mores Pops Recipe is going to steal your heart. This delightful, no-bake dessert combines all the best parts of s’mores—crunchy graham crackers, ooey-gooey marshmallow goodness, and rich, melty chocolate—layered beautifully into a playful pop-on-a-stick. It’s a magical treat that feels like childhood summers and cozy get-togethers all wrapped up in one bite, perfect for impressing friends or treating yourself to something special anytime at home.
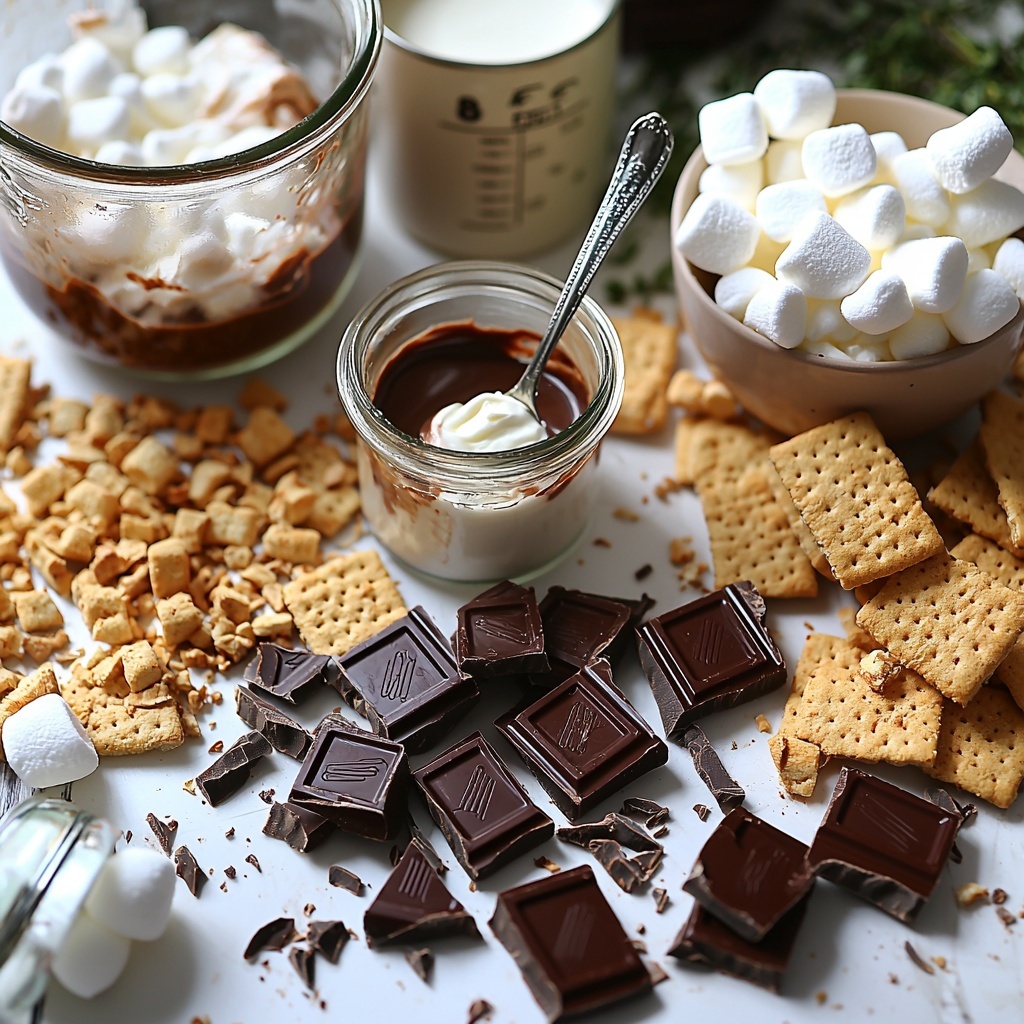
Ingredients You’ll Need
The charm of this recipe lies in its simplicity. With just a few pantry staples that each bring an important element to the party—texture, creaminess, sweetness, and that signature chocolate flavor—these ingredients come together to create a beautiful balance in every layered pop.
- Hershey chocolate bars (chopped, divided): Use good quality chocolate for a smooth and rich melt that will harmonize perfectly with the other layers.
- Heavy whipping cream: This brings a luscious, airy texture that lightens up the marshmallow mixture beautifully.
- Marshmallow crème (1 jar): The secret to that delightfully gooey texture that’s softer and spreadable compared to regular marshmallows.
- Milk: Just a bit to make the marshmallow and cream mixture silky and easy to layer.
- Graham crackers (coarsely crushed and broken): Adds the essential crunch and classic flavor that marries so well with chocolate and marshmallow.
- Miniature marshmallows: Little pockets of chewy, melty sweetness layered in for extra texture and fun!
How to Make Layered S’mores Pops Recipe
Step 1: Melt the Chocolate
Start by setting aside 2 tablespoons of chopped chocolate for topping later. Then melt the rest in a microwave-safe bowl by heating in 30-second bursts, stirring in between to achieve a silky, smooth chocolate liquid. This takes just about a minute and ensures the chocolate melts evenly without burning, which is key to that irresistible shiny finish.
Step 2: Whip the Cream and Marshmallow Mixture
Next, grab your mixer and beat the heavy whipping cream on high speed until soft peaks start to form—this fluffy base is what makes the pops dreamy and cloud-like. Add in the marshmallow crème and continue beating for around 30 seconds to blend it all together, then pour in a splash of milk to loosen the texture until it’s smooth and spreadable. This mixture is the gooey heart of your Layered S’mores Pops Recipe.
Step 3: Assemble the Layers
Place dixie cups on a tray to keep things neat. Begin by spooning 2 teaspoons of crushed graham crackers into each cup, creating that classic crunchy layer at the bottom. Follow with 3 or 4 miniature marshmallows to add little pockets of sweetness. Then drizzle approximately 2 teaspoons of your melted chocolate over the marshmallows. Finally, top this with about 3 tablespoons of the whipped cream and marshmallow blend. Repeat these layers one more time to build that perfect, indulgent stack.
Step 4: Finish with Toppings and Popsicle Sticks
For the grand finale, sprinkle the tops with the reserved chopped chocolate and some remaining crushed graham crackers to add a little extra texture and chocolatey pop. Insert popsicle sticks down through the layers to give your s’mores pops that classic handheld charm, making them as fun to eat as they are delicious.
How to Serve Layered S’mores Pops Recipe
Garnishes
To elevate your Layered S’mores Pops Recipe, feel free to add a few finishing touches. A light dusting of cocoa powder, a drizzle of caramel sauce, or a sprinkle of sea salt can add a gourmet flair. Toasted marshmallow bits or even tiny chocolate chips scattered on top add a fun crunch and extra sweetness.
Side Dishes
These pops are a stellar centerpiece for any dessert table, but they pair beautifully with fresh fruit like sliced strawberries or bananas to balance the richness. You could also serve them alongside vanilla ice cream or a scoop of berry sorbet for a contrast of cold and creamy textures that will delight every palate.
Creative Ways to Present
Presentation can turn simple treats into party showstoppers. Instead of dixie cups, consider clear plastic shot glasses to highlight the layers, or mini mason jars for a rustic look. You could also arrange the pops upright in a decorated foam block covered with aluminum foil or parchment paper to display their appealing layers while keeping them steady and mess-free.
Make Ahead and Storage
Storing Leftovers
If you have any leftovers (though that might be rare), store your Layered S’mores Pops in the refrigerator covered with plastic wrap or in an airtight container. They will keep well for up to 3 days while maintaining their creamy texture and fresh flavors.
Freezing
For longer storage, these pops freeze beautifully. Wrap each one in plastic wrap or place them in a freezer-safe container. When you’re ready for a sweet treat, simply thaw them in the refrigerator for a few hours before serving to preserve their layered integrity and texture.
Reheating
This dessert is best enjoyed cold or at room temperature, so reheating is generally not necessary. However, if you want that melted chocolate warmth, briefly microwave a pop for 5 to 10 seconds, just enough to soften without losing the layers’ structure.
FAQs
Can I use a different type of chocolate?
Absolutely! While Hershey bars are classic, feel free to experiment with milk, dark, or even flavored chocolates to customize your Layered S’mores Pops Recipe to your taste buds. Just make sure the chocolate melts smoothly for easy layering.
Is there a non-dairy version of this recipe?
You can swap out heavy cream for coconut cream and use a dairy-free marshmallow crème to create a vegan-friendly version. The layers will still taste indulgent and maintain that luscious texture.
How long does it take to set before serving?
After assembling your Layered S’mores Pops Recipe, it’s best to chill them in the refrigerator for about 4 hours to let the flavors meld and the layers firm up slightly for easier handling and eating.
Can I make these without popsicle sticks?
Yes, you can definitely serve the layered dessert in cups without sticks as little parfaits or mini trifles, but the stick adds a whimsical touch and makes them super fun to eat on the go!
What if I don’t have dixie cups?
Any small disposable cups or even reusable silicone molds will work perfectly. Just make sure they are sturdy and can hold the layers without tipping over during assembly and chilling.
Final Thoughts
This Layered S’mores Pops Recipe is truly one of those special desserts that brings out joy with every bite. Whether you’re reminiscing about campfire nights or wanting an easy yet impressive no-bake treat, these pops hit every note perfectly. I hope you dive into making them soon and discover just how much fun layering flavor and texture can be. Happy popping!
“`
Print
Layered S’mores Pops Recipe
- Prep Time: 15 minutes
- Cook Time: 5 minutes
- Total Time: 4 hours 20 minutes
- Yield: 8 servings
- Category: Dessert
- Method: No-Cook
- Cuisine: American
Description
These Layered S’mores Pops are a delightful, no-bake treat that captures the classic campfire flavors of s’mores in a fun, portable pop form. Layers of melted chocolate, graham crackers, mini marshmallows, and a fluffy marshmallow-cream mixture are assembled in cups and frozen to create a perfect summer dessert that’s easy to make and great for gatherings.
Ingredients
Chocolate
- 4 Hershey chocolate bars, chopped and divided
Dairy & Cream
- 1½ cups heavy whipping cream
- ¼ cup milk
Sweeteners & Marshmallows
- 7 oz Marshmallow crème (1 jar)
- ¾ cup miniature marshmallows
Crackers
- 4 graham crackers, coarsely crushed and broken
Instructions
- Melt the chocolate: Take 2 tablespoons of the chopped chocolate and set aside for topping later. Place the remaining chopped chocolate in a small microwave-safe bowl and microwave for about 1 minute, stirring every 30 seconds until completely melted and smooth. Set aside to cool slightly.
- Prepare the marshmallow cream mixture: Using a mixer, beat the heavy whipping cream on high speed until soft peaks form. Gently fold in the marshmallow crème and continue beating for about 30 seconds to combine well. Add the milk and blend until everything is fully incorporated and smooth.
- Assemble the layers: Arrange dixie cups or small disposable cups on a tray for stability. Spoon about 2 teaspoons of crushed graham crackers into the bottom of each cup. Add 3 to 4 miniature marshmallows on top of the crackers, then drizzle approximately 2 teaspoons of the melted chocolate over them. Spoon about 3 tablespoons of the blended whipped cream and marshmallow mixture atop the chocolate. Repeat these layering steps once more in each cup to build up the layers.
- Finish and insert popsicle sticks: Sprinkle the remaining chopped chocolate and crushed graham crackers over the top layer in each cup. Carefully insert a popsicle stick into the center of each cup to serve as a handle. Place the cups in the freezer and chill for approximately 4 hours or until firm and frozen, ready to enjoy as frozen s’mores pops.
Notes
- For best results, chill the cups in the freezer until completely firm before serving to maintain their shape.
- You can substitute the Hershey bars with your favorite chocolate for a personalized twist.
- If miniature marshmallows are unavailable, chop regular marshmallows into small pieces.
- These pops can be stored in the freezer for up to 1 week in an airtight container.
- To make layering easier and less messy, use a small spoon or piping bag for the whipped cream mixture.


