
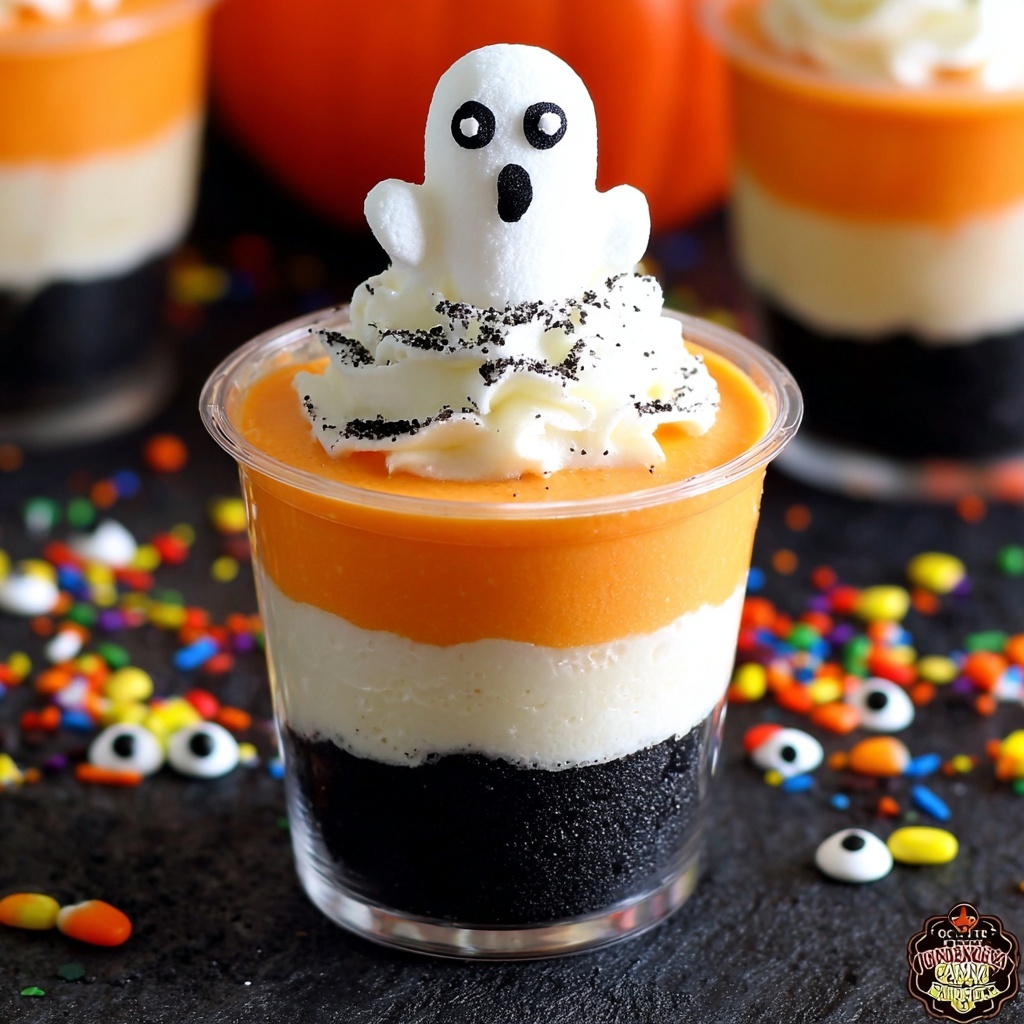
If you’re looking to treat yourself and your guests to something sweet, fun, and festive this spooky season, you have to try the No-Bake Halloween Cheesecake Cups Recipe. These adorable layered cheesecake cups burst with creamy texture and vibrant orange and purple colors that scream Halloween spirit. They combine the rich, silky taste of cheesecake with a chocolate cookie crumb crust, all without ever turning on the oven. Each bite is a perfect balance of sweet and smooth, making this recipe a delightful showstopper for any Halloween gathering or cozy night in. Plus, they’re super easy to whip up, which is a total win in my book!
Ingredients You’ll Need
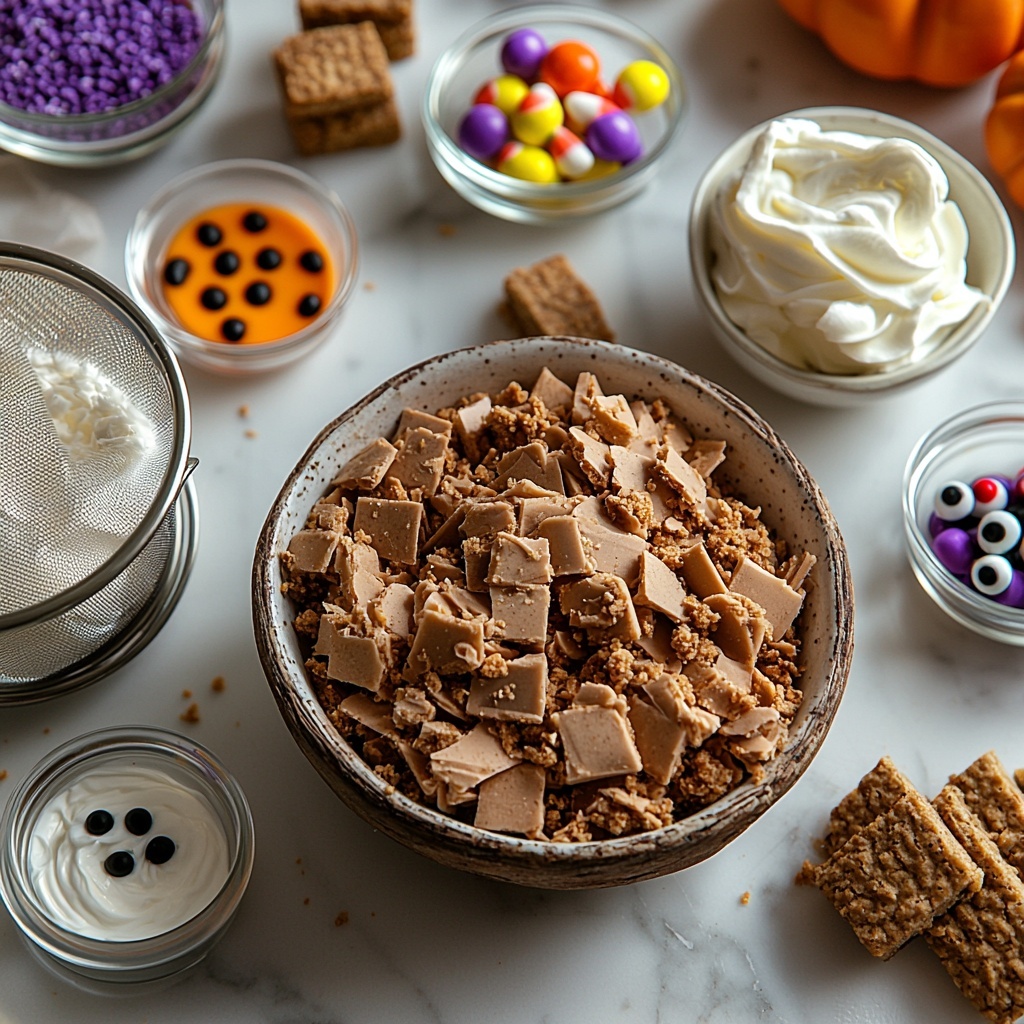
Gathering these simple but essential ingredients is the first step to magic. Each contributes something special—whether it’s richness, color, or crunch—that brings these festive cheesecake cups to life.
- Chocolate sandwich cookie crumbs: Creates the perfect crunchy, chocolatey base that holds all the creamy layers beautifully.
- Unsalted butter, melted: Helps bind the cookie crumbs into a compact crust that’s rich and buttery.
- Cream cheese, softened: The heart of the cheesecake, providing a velvety smooth texture that’s full of tang.
- Powdered sugar: Sweetens the cheesecake filling without any grittiness, ensuring smoothness.
- Vanilla extract: Adds warmth and depth to balance the tanginess of the cream cheese.
- Heavy whipping cream, cold: Whipped to stiff peaks, it lightens the cream cheese mixture, making it fluffy and airy.
- Orange and purple gel food coloring: These bring the Halloween theme to life with vibrant, eye-catching layers.
- Halloween sprinkles or candy eyes (optional): Perfect for adding that final festive touch and a bit of fun texture.
How to Make No-Bake Halloween Cheesecake Cups Recipe
Step 1: Prepare the Chocolate Cookie Crust
Start by mixing the chocolate sandwich cookie crumbs with the melted butter in a medium bowl. Make sure each crumb is coated evenly so the crust is flavorful and holds together well. Press about two tablespoons of this mixture into the bottom of each serving cup to form a compact crust layer. Firmly pressing down will give you that satisfying bite and sturdy base for your cheesecake layers.
Step 2: Whip the Cream Cheese Mixture
In a large bowl, beat the softened cream cheese until it’s perfectly smooth—this is key for that silky texture everyone loves. Then, add the powdered sugar and vanilla extract, mixing until fully combined. The sweetness balances out the tang of the cream cheese and the vanilla brings in a lovely aroma and warmth.
Step 3: Whip the Heavy Cream
In a separate bowl, whip the cold heavy cream to stiff peaks. This step is essential because the whipped cream folds into the dense cream cheese mixture, lightening it to an irresistible fluffiness. Be patient to get those stiff peaks for maximum volume and a dreamy texture.
Step 4: Combine and Color the Filling
Gently fold the whipped cream into the cream cheese mixture to create a light, airy cheesecake filling. Divide this filling evenly into two bowls. Tint one batch bright orange and the other a deep purple using gel food coloring. These vibrant layers will dazzle your guests and really channel the Halloween vibes!
Step 5: Layer the Cheesecake Cups
Spoon or pipe the orange and purple fillings alternately over the chocolate cookie crust in each cup. Creating neat layers adds a stunning visual impact and makes every bite a fun surprise of color. Use a spatula or the back of a spoon to smooth the tops.
Step 6: Add Finishing Touches and Chill
Sprinkle Halloween-themed decorations like candy eyes or festive sprinkles on top if you like a little extra flair. Then pop the cups in the refrigerator for at least two hours to set. This chilling step allows the flavors to meld and the cheesecake to firm up perfectly without baking.
How to Serve No-Bake Halloween Cheesecake Cups Recipe
Garnishes
Adding garnishes is such a simple way to make your No-Bake Halloween Cheesecake Cups even more festive and personalized. Think playful candy eyes for a cheeky monster look, festive Halloween sprinkles for that classic vibe, or even some edible glitter for a touch of spooky sparkle. Fresh berries or mint leaves can add a fancy contrast if you want to mix in some freshness.
Side Dishes
These cheesecake cups shine as a stand-alone dessert, but if you’re planning a full Halloween spread, consider pairing them with light, seasonal fruit salads or spiced apple cider to complement the rich, creamy sweetness. Another fun option is to serve them alongside mini pumpkin muffins or ginger snaps for extra crunch and flavor variety.
Creative Ways to Present
Presentation makes everything more exciting, especially at Halloween parties. Serve these cheesecake cups in clear plastic or glass cups to show off the beautiful layers. For a dramatic display, arrange them on a tiered tray with faux spider webs and tiny Halloween props. Using small shot glasses or mini mason jars also adds a charming touch and makes serving super easy.
Make Ahead and Storage
Storing Leftovers
These cheesecake cups keep wonderfully in the fridge for up to 24 hours, making them perfect for preparing in advance of your party or spooky celebration. Just cover them tightly with plastic wrap or lids to prevent the filling from drying out or picking up other fridge odors.
Freezing
If you want to make these ahead of time and store them for longer, freezing is an option. Freeze the cups uncovered initially until solid, then cover tightly with plastic wrap or move them to an airtight container. When you’re ready to eat, thaw the cheesecake cups overnight in the fridge to preserve their creamy texture.
Reheating
Since this is a no-bake dessert designed to be served chilled, reheating is not recommended. Instead, simply take the cups out of the fridge about 10 minutes before serving to allow them to soften slightly, ensuring the best texture and flavor.
FAQs
Can I use a different type of cookie for the crust?
Absolutely! While chocolate sandwich cookies provide a classic rich base, you can experiment with graham cracker crumbs, gingersnaps, or even crushed pretzels for a salty twist. Just be sure to adjust the butter amount to get the right crust consistency.
Is there a substitute for heavy whipping cream?
For best results, heavy whipping cream is ideal because it whips into stiff peaks and lightens the filling. However, you could try using whipped coconut cream as a dairy-free alternative, though the texture and flavor might be slightly different.
Can I make this recipe vegan?
With a few ingredient swaps, yes! Use vegan cream cheese and coconut cream instead of dairy products, and find vegan cookie crumbs for the crust. Keep in mind that the texture and flavor will vary a bit, but it’s still a fun and festive vegan-friendly treat.
How do I achieve the bright orange and purple colors?
The key is using gel food coloring rather than liquid dyes, as gels are more concentrated and won’t thin out the cheesecake mixture. Add a little at a time until you reach your desired vibrancy.
Can I prepare these in larger containers instead of individual cups?
Definitely! You can make this cheesecake in a larger glass dish and layer the colors as you would in cups. Just keep in mind that portioning and presentation won’t be quite as fun, but the flavor will be just as amazing.
Final Thoughts
I cannot recommend the No-Bake Halloween Cheesecake Cups Recipe enough if you want to impress guests or treat yourself with a festive, delicious dessert. Its mix of creamy cheesecake, chocolatey crust, and vibrant colors feels like Halloween in every bite. Plus, the no-bake convenience means less time fussing and more time enjoying the spooky fun. Give it a try—you’ll be so happy you did!
Print
No-Bake Halloween Cheesecake Cups Recipe
- Prep Time: 20 minutes
- Cook Time: 0 minutes
- Total Time: 2 hours 20 minutes
- Yield: 8 cups
- Category: Dessert
- Method: No-Bake
- Cuisine: American
- Diet: Vegetarian
Description
These No-Bake Halloween Cheesecake Cups are a festive and easy-to-make dessert perfect for Halloween parties. Featuring layers of colorful orange and purple creamy cheesecake atop a chocolate cookie crumb crust, these cups are both visually striking and delicious. No baking required, they set in the refrigerator making them a quick and simple treat that delights kids and adults alike.
Ingredients
Crust
- 1 1/2 cups chocolate sandwich cookie crumbs
- 4 tablespoons unsalted butter, melted
Filling
- 16 ounces cream cheese, softened
- 3/4 cup powdered sugar
- 1 teaspoon vanilla extract
- 1 cup heavy whipping cream, cold
- Orange gel food coloring
- Purple gel food coloring
Topping (Optional)
- Halloween sprinkles or candy eyes
Instructions
- Prepare the crust: In a medium bowl, combine the chocolate cookie crumbs with the melted butter and mix until evenly incorporated. Spoon about 2 tablespoons of this mixture into the bottom of each small serving cup and press down firmly to form a solid crust layer.
- Make the cheesecake base: In a large bowl, beat the softened cream cheese until smooth and creamy. Add the powdered sugar and vanilla extract, then mix thoroughly until fully combined and silky.
- Whip the cream: In a separate bowl, whip the cold heavy cream to stiff peaks, ensuring it holds firm shapes without collapsing.
- Combine whipped cream and cream cheese: Gently fold the whipped cream into the cream cheese mixture carefully to maintain a light and fluffy texture without deflating the airiness.
- Color the cheesecake filling: Divide the filling evenly into two separate bowls. Tint one bowl with orange gel food coloring and the other with purple gel food coloring, blending until the colors are uniform and vibrant.
- Assemble the layers: Spoon or pipe alternating layers of the orange and purple cheesecake filling over the prepared chocolate crusts in the serving cups. Smooth the tops with a spatula for an even finish.
- Decorate and chill: Add Halloween sprinkles or candy eyes on top if desired for extra festive flair. Refrigerate the assembled cups for at least 2 hours to allow them to set before serving.
Notes
- Use clear plastic cups to showcase the colorful layered cheesecake for a fun presentation.
- For easier piping, transfer the cheesecake mixtures into zip-top bags and snip a corner to pipe neat layers.
- These cheesecake cups can be prepared up to 24 hours in advance and stored refrigerated to save time on party day.

