
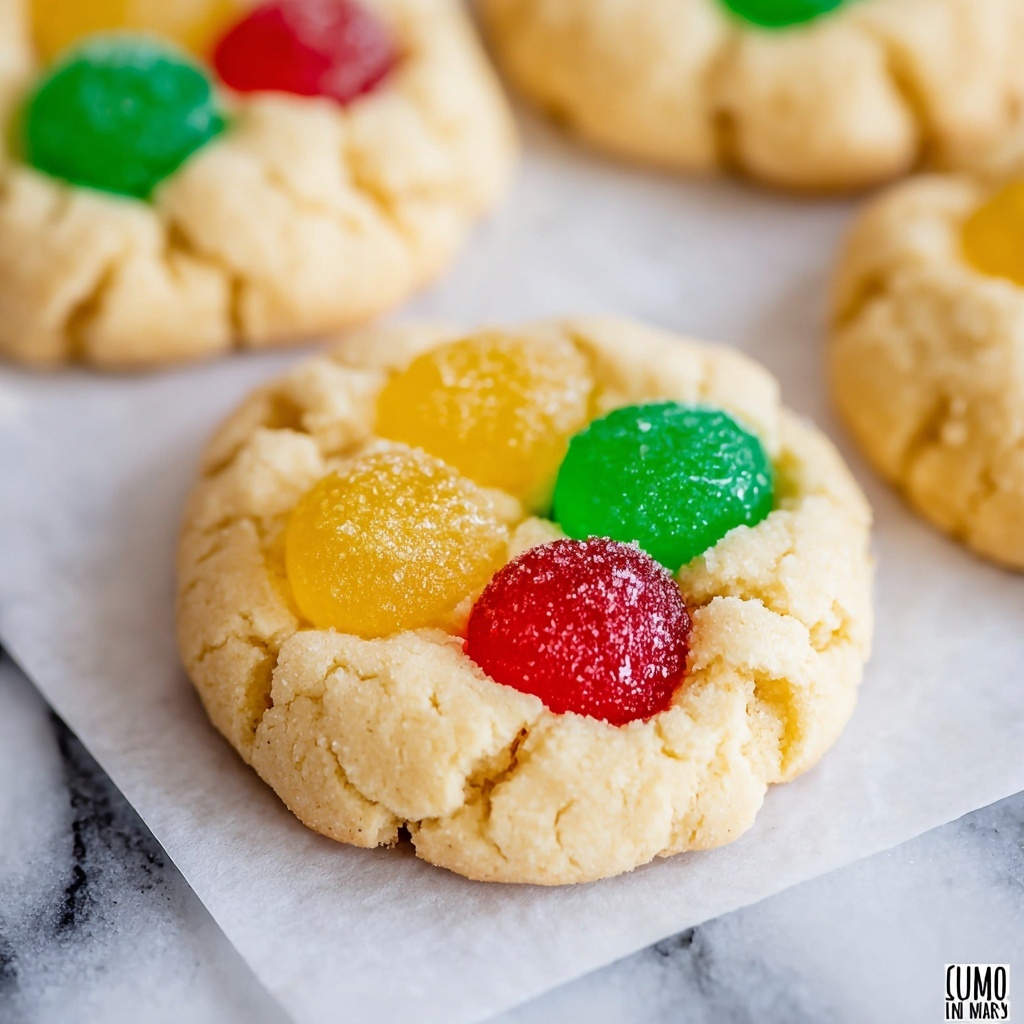
If you’re looking to add a burst of color, chewy sweetness, and nostalgia to your holiday baking, this Retro Christmas Gumdrop Cookies Recipe is exactly what you need. These cookies are a delightful mix of buttery richness and fruity gumdrops, embodying the festive spirit with every bite. They’re wonderfully soft with just the right touch of chew, and those vibrant gumdrops are like little pockets of joy that bring both texture and eye-catching charm to your holiday cookie platter. Whether you’re making these for your family, friends, or Santa himself, this recipe brings a heartfelt classic vibe to your Christmas kitchen.
Ingredients You’ll Need
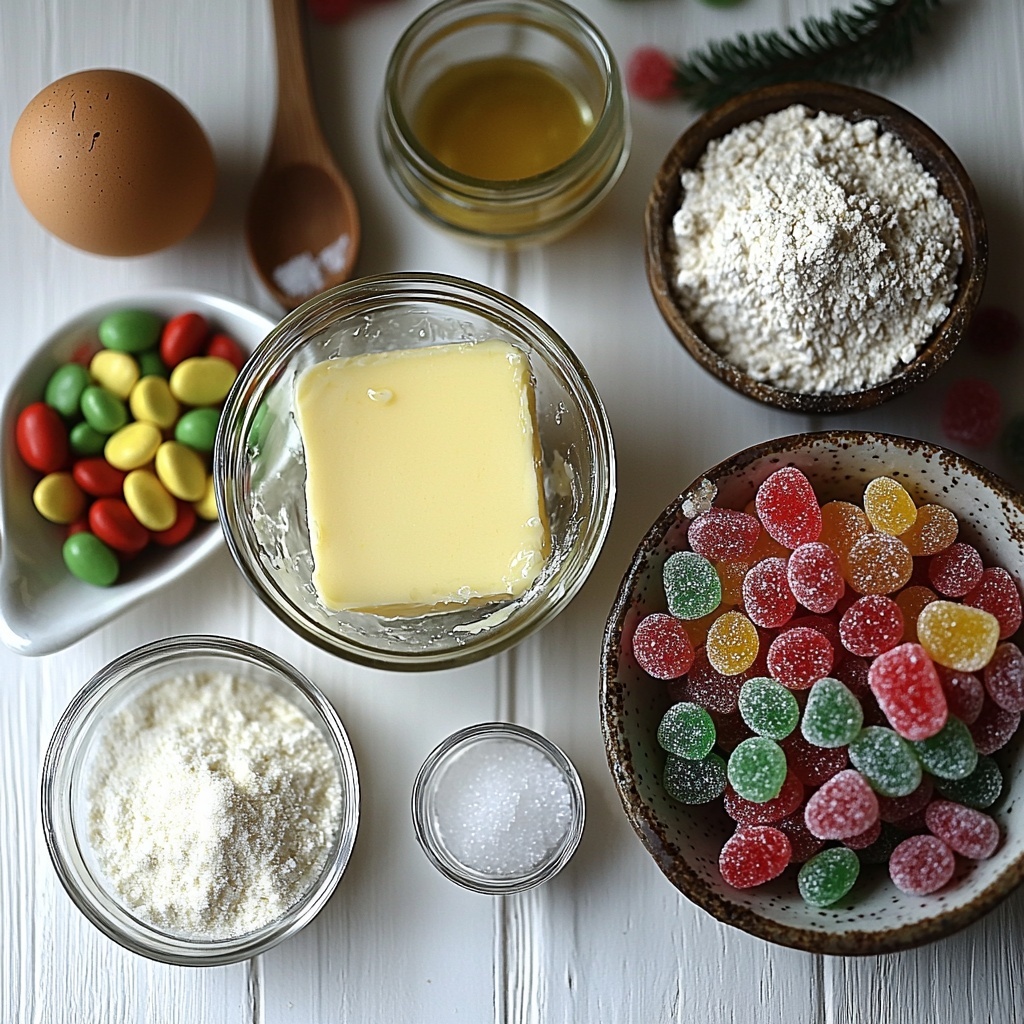
This Retro Christmas Gumdrop Cookies Recipe calls for simple, pantry-friendly ingredients that come together to create magic. Each ingredient plays a crucial role—from the creamy butter that gives the cookies their tender crumb to the chopped gumdrops that add pops of flavor and color. You don’t need anything fancy, just a handful of basics that transform into a sweet holiday treat.
- 1 cup unsalted butter, softened: Soften it to room temperature so it creams nicely with sugar for that perfect cookie base.
- 1 cup granulated sugar: Adds sweetness and helps create the characteristic light texture of the cookie.
- 1 large egg: Acts as a binder to bring the dough together and provide moisture.
- 1 teaspoon vanilla extract: Infuses the dough with warm, sweet flavor that complements the gumdrops perfectly.
- 2 1/4 cups all-purpose flour: Provides structure to the cookies; measure carefully for the ideal texture.
- 1/2 teaspoon baking soda: Leavens the cookies, helping them rise just enough to be soft and chewy.
- 1/4 teaspoon salt: Balances sweetness and enhances the other flavors.
- 1 cup fruit-flavored gumdrops, chopped and floured: These are the star of the show—chopping and tossing in flour prevents sticking during baking.
How to Make Retro Christmas Gumdrop Cookies Recipe
Step 1: Prepare the Gumdrops
Start by chopping your fruit-flavored gumdrops into small pieces. It’s important to toss them with a little flour to keep them from melting together or sinking to the bottom of your dough. This step ensures each cookie gets a colorful, chewy burst in every bite.
Step 2: Cream Butter and Sugar
Cream together the softened butter and granulated sugar until the mixture looks light and fluffy. This is the foundation for your beautiful cookie texture, and the more air you incorporate now, the better your cookies will be.
Step 3: Add Egg and Vanilla
Beat in the egg and vanilla extract until everything is smooth and well combined. These add moisture and aroma that bring your cookies to life.
Step 4: Mix Dry Ingredients
In a separate bowl, whisk the all-purpose flour, baking soda, and salt together. This ensures even distribution of the leavening agent and salt, which helps the dough rise evenly and enhances flavor.
Step 5: Combine Wet and Dry
Gradually incorporate the dry ingredients into the wet mixture, stirring gently until a soft dough forms. Be careful not to overmix, or your cookies could turn out tough instead of tender.
Step 6: Fold in the Gumdrops
Gently fold in the floured gumdrop pieces to spread them evenly throughout your dough. This step brings all those glowing colors and fruity bursts into every cookie.
Step 7: Optional Chilling
If time allows, chill the dough for about 30 minutes. This helps the cookies hold their shape better and prevents excessive spreading during baking.
Step 8: Prepare Oven and Baking Sheets
Preheat your oven to 350°F (175°C) and line baking sheets with parchment paper for easy cleanup and even baking.
Step 9: Scoop the Dough
Scoop tablespoon-sized balls of dough and place them about 2 inches apart on the parchment-lined sheets. This spacing lets the cookies spread just enough without sticking together.
Step 10: Bake to Perfection
Bake the cookies for 9 to 11 minutes, until the edges turn golden and the centers look just set. You’ll know they’re done when they’re firm but still soft to the touch.
Step 11: Cool and Enjoy
Allow the cookies to cool on the baking sheet for 5 minutes before transferring them to a wire rack to cool completely. This little pause helps them firm up without breaking apart.
How to Serve Retro Christmas Gumdrop Cookies Recipe
Garnishes
These cookies are colorful and beautiful on their own, but feel free to add a dusting of powdered sugar or a light drizzle of white chocolate to make them feel extra festive. A sprinkle of finely chopped nuts on top before baking can also add a delightful crunch.
Side Dishes
Serve these gumdrop cookies with a glass of cold milk, hot cocoa, or a warm spiced cider for the ultimate cozy holiday experience. Their sweet chewiness pairs well with warm, comforting drinks to balance the flavors.
Creative Ways to Present
Stack Retro Christmas Gumdrop Cookies Recipe in a festive tin lined with holiday-themed wax paper or place them around a centerpiece of evergreen sprigs and pinecones. They also make charming edible gifts when packaged in clear cellophane bags tied with ribbon.
Make Ahead and Storage
Storing Leftovers
Store leftover gumdrop cookies in an airtight container at room temperature for up to a week. Keeping them sealed tightly will preserve their chewy texture and prevent them from drying out.
Freezing
You can freeze the dough or the baked cookies! For dough, shape the cookie balls and freeze them on a tray before transferring to a freezer bag. When ready to bake, pop them straight into the oven for a few extra minutes. Baked cookies freeze well too—wrap them in plastic wrap and place in a freezer-safe container for up to three months.
Reheating
To enjoy stored cookies warm, microwave them for about 10 seconds or reheat briefly in a 300°F oven. This refreshes their soft, chewy appeal and warms the gumdrops deliciously.
FAQs
Can I use different types of gumdrops for this recipe?
Absolutely! Feel free to experiment with various fruit flavors or even sugar-free gumdrops. Just chop them finely and toss with a bit of flour as instructed to keep the texture just right.
Will these cookies work if I don’t chill the dough?
Yes, chilling is optional. Chilling helps the cookies hold their shape better but skipping this step won’t ruin them—it just means they may spread a bit more during baking.
Can I substitute any ingredients in this Retro Christmas Gumdrop Cookies Recipe?
You can substitute butter with margarine or a butter substitute, but for the best flavor and texture, unsalted butter is recommended. Similarly, vanilla extract can be swapped for almond extract if you want a different flavor twist.
How do I prevent gumdrops from melting completely in the cookies?
Coating the chopped gumdrops with flour before folding them into the dough is the key. This helps them stay intact and evenly dispersed rather than melting into the cookie dough.
Can I make these cookies gluten-free?
Yes! Use a gluten-free all-purpose flour blend that measures cup-for-cup with regular flour. Your cookies might have a slightly different texture, but they’ll still be just as tasty and festive.
Final Thoughts
I can’t recommend this Retro Christmas Gumdrop Cookies Recipe enough for anyone wanting a fun, colorful, and nostalgic treat on their holiday table. It’s a recipe that brings joy not only through its taste but also through charming tradition and vibrant cheer. Give it a try, and I promise it’ll become one of your own joyful holiday favorites as well!
Print
Retro Christmas Gumdrop Cookies Recipe
- Prep Time: 20 minutes
- Cook Time: 11 minutes
- Total Time: 31 minutes
- Yield: 24 cookies
- Category: Dessert
- Method: Baking
- Cuisine: American
Description
These Retro Christmas Gumdrop Cookies are classic holiday treats that combine a soft, buttery sugar cookie base with colorful, chewy fruit-flavored gumdrops. Perfect for festive gatherings, they offer a delightful balance of sweetness and texture, brightening up any cookie platter with their vibrant colors and nostalgic charm.
Ingredients
Cookie Dough Ingredients
- 1 cup unsalted butter, softened
- 1 cup granulated sugar
- 1 large egg
- 1 teaspoon vanilla extract
- 2 1/4 cups all-purpose flour
- 1/2 teaspoon baking soda
- 1/4 teaspoon salt
Gumdrop Mixture
- 1 cup fruit-flavored gumdrops, chopped and floured
Instructions
- Prepare the gumdrops: Chop the fruit-flavored gumdrops into small pieces and toss them with a little flour to prevent them from sticking together or sinking in the dough.
- Cream butter and sugar: In a large bowl, cream the softened butter and granulated sugar together until the mixture is light, fluffy, and well combined, which usually takes a few minutes using an electric mixer.
- Add egg and vanilla: Beat in the large egg and vanilla extract until the batter is smooth and homogeneous.
- Mix dry ingredients: In a separate bowl, whisk together all-purpose flour, baking soda, and salt to ensure even distribution of leavening and seasoning.
- Combine wet and dry ingredients: Gradually incorporate the dry ingredient mixture into the wet ingredients until a soft cookie dough forms without overmixing to keep the cookies tender.
- Fold in gumdrops: Gently fold the floured gumdrop pieces into the dough, ensuring an even distribution without crushing them.
- Chill dough (optional): For better shape and texture, chill the dough in the refrigerator for about 30 minutes before baking.
- Preheat oven: Set the oven to 350°F (175°C) and line baking sheets with parchment paper to prevent sticking and facilitate cleanup.
- Form cookie balls: Scoop tablespoon-sized portions of dough and place them on the prepared baking sheets, spacing each about 2 inches apart to allow for spreading.
- Bake the cookies: Bake for 9 to 11 minutes, or until the edges turn a light golden brown and the centers are set but still soft.
- Cool properly: Let the cookies cool on the baking sheet for 5 minutes after removal from the oven, then transfer them to a wire rack to cool completely, preserving their texture and preventing sogginess.
Notes
- Flouring the gumdrops prevents them from sinking to the bottom of the cookies during baking.
- Chilling the dough helps cookies keep their shape and reduces spreading in the oven.
- Use parchment paper or silicone mats for easy removal and cleaning.
- Store cookies in an airtight container at room temperature to maintain freshness for up to a week.
- Feel free to substitute the gumdrops with other chewy candies like chopped jelly beans or dried fruit for variation.


