
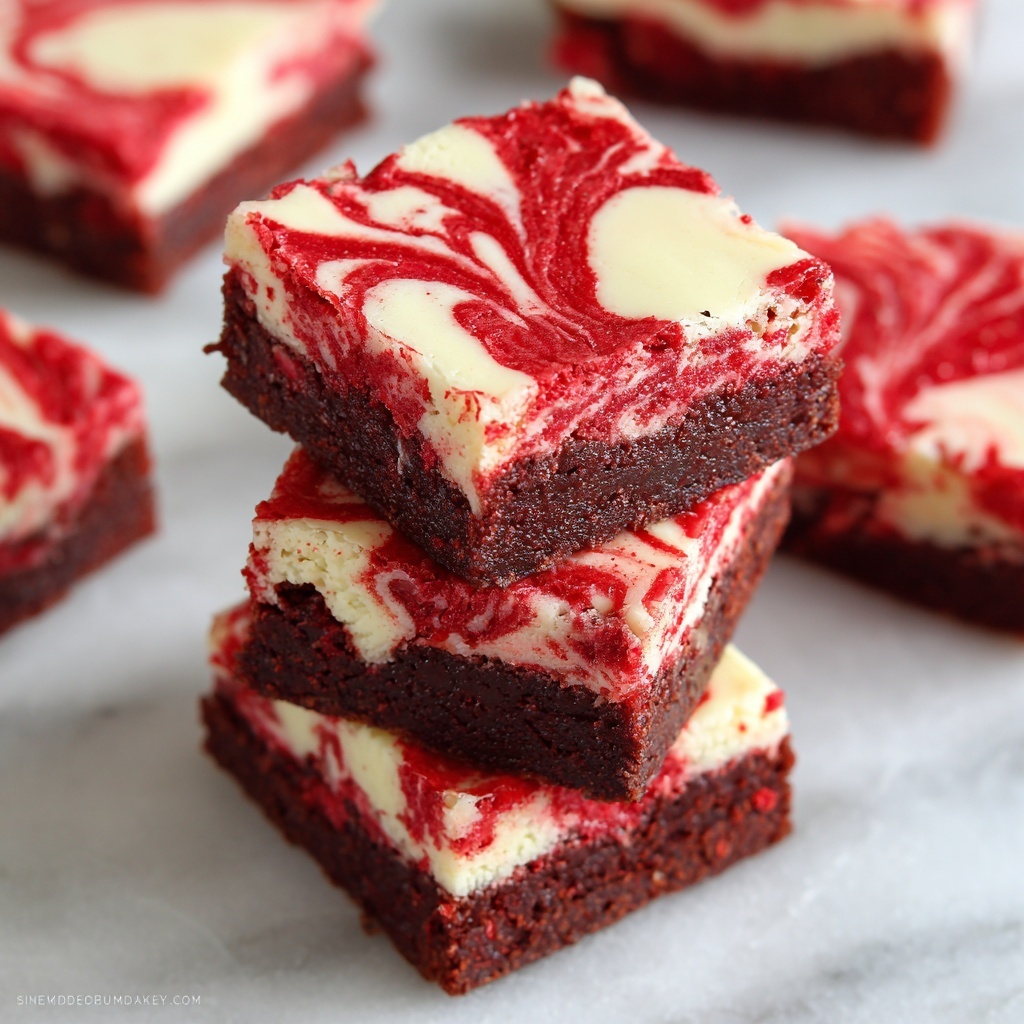
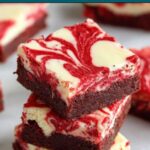
If you’re craving a dessert that perfectly balances rich, velvety chocolate with a tangy cream cheese touch, you’re in for a treat with this Red Velvet Brownies with Cream Cheese Swirl Recipe. These brownies are a stunning way to combine the beloved flavor of red velvet cake with the fudgy decadence of brownies, all elevated by swirls of luscious cream cheese. Every bite offers a beautiful marbled effect and a harmonious blend of sweet and slightly tangy flavors that will have you reaching for more. Whether you’re making these for a special occasion or just to brighten a cozy afternoon, this recipe is as delightful to make as it is to eat.
Ingredients You’ll Need
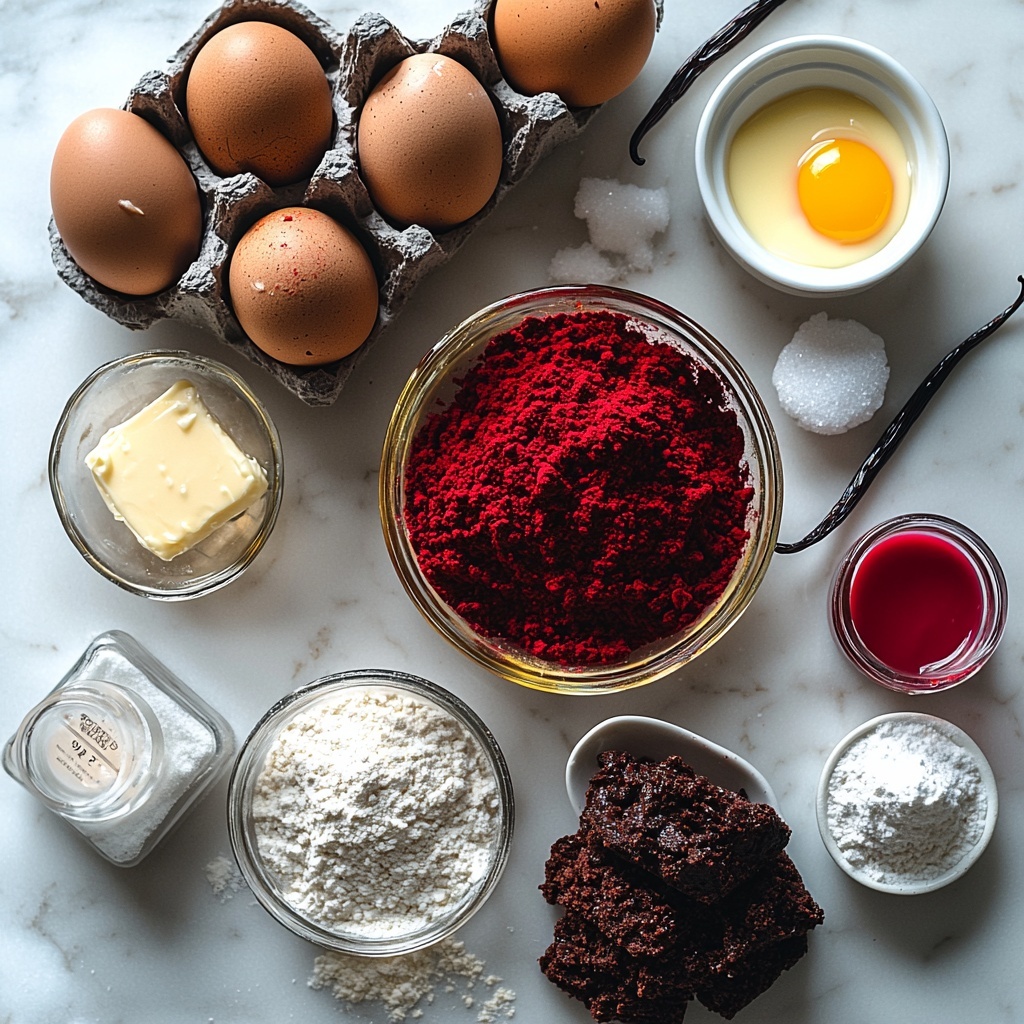
Getting started with the Red Velvet Brownies with Cream Cheese Swirl Recipe means assembling a handful of simple, pantry-friendly ingredients that each play a critical role in the final texture, flavor, and that vibrant red hue you expect.
- 1/2 cup unsalted butter, melted: Adds rich moisture and helps create that fudge-like brownie texture.
- 1 cup granulated sugar: Sweetens the brownies perfectly without overpowering the red velvet flavor.
- 2 large eggs, room temperature: Bind the ingredients and provide structure with a tender crumb.
- 1 tablespoon red food coloring: The signature ingredient that gives red velvet its iconic, vivid color.
- 1 teaspoon vanilla extract: Enhances the flavor with warm, aromatic notes.
- 1 tablespoon unsweetened cocoa powder: Offers a subtle chocolate undertone essential to red velvet’s charm.
- 3/4 cup all-purpose flour: Creates just the right density for sturdier, yet soft brownies.
- 1/4 teaspoon salt: Balances and elevates the sweetness and chocolate flavors.
- For the cream cheese swirl: 8 ounces softened cream cheese, 1/4 cup granulated sugar, 1 large egg yolk, and 1/2 teaspoon vanilla extract, combine to deliver a tangy, creamy contrast that lights up each bite.
How to Make Red Velvet Brownies with Cream Cheese Swirl Recipe
Step 1: Prep and Mix the Brownie Batter
Start by preheating your oven to 350°F and lining an 8×8-inch baking pan with parchment paper — this ensures your brownies come out clean and intact. In a large bowl, whisk together the melted butter and sugar until they form a smooth, glossy mixture. Then, beat in the eggs, red food coloring, and vanilla extract until everything is fully combined, which will give your batter that beautiful bright red base.
Step 2: Add the Chocolate and Dry Ingredients
Next, stir in the cocoa powder to infuse just the right hint of chocolate that’s essential to red velvet flavor without overshadowing it. Gently fold in the flour and salt until you don’t see any dry streaks; this delicate folding keeps your brownies tender rather than tough.
Step 3: Prepare the Cream Cheese Swirl
In a separate bowl, beat together the softened cream cheese, sugar, egg yolk, and vanilla extract until smooth and creamy. This mixture will become the luscious swirl topper that contrasts perfectly with the dense brownie base.
Step 4: Assemble and Swirl
Pour the red velvet batter evenly into your prepared pan. Spoon dollops of the cream cheese mixture over the batter in random spots, then use a knife or skewer to swirl the two batters together gently. This marbling technique creates the stunning, signature look of the Red Velvet Brownies with Cream Cheese Swirl Recipe.
Step 5: Bake and Cool
Bake the brownies for 28 to 32 minutes, or until the center is set and a toothpick inserted comes out with just a few moist crumbs. Cooling is crucial — let your brownies cool completely in the pan before slicing for the cleanest cuts and the best texture.
How to Serve Red Velvet Brownies with Cream Cheese Swirl Recipe
Garnishes
Adding a simple garnish can elevate your brownies from delicious to unforgettable. Sprinkle some powdered sugar lightly over the top or add a few fresh raspberries or strawberries for a pop of color and fruity brightness that pairs nicely with the cream cheese swirl.
Side Dishes
A scoop of vanilla bean ice cream or a dollop of whipped cream makes a perfect companion to these rich red velvet brownies. For a festive touch, serve alongside a cup of strong coffee or hot chocolate to complement the sweetness and balance the flavors.
Creative Ways to Present
For parties or special occasions, cut the brownies into bite-sized squares and serve on a decorative platter with mini forks. You can also layer them in clear glass jars with whipped cream and fresh berries for an elegant dessert parfait. The vibrant colors and creamy swirls make presentation effortless and eye-catching.
Make Ahead and Storage
Storing Leftovers
After tasting these divine Red Velvet Brownies with Cream Cheese Swirl Recipe leftovers, you’ll want to keep them fresh. Store any unused brownies in an airtight container in the refrigerator for up to 4 days. This keeps the cream cheese swirl nice and creamy without drying out the rich brownie base.
Freezing
You can freeze the brownies to enjoy later by wrapping them tightly in plastic wrap and placing them in a freezer-safe bag or container. Freeze for up to 2 months. Thaw the brownies overnight in the refrigerator before serving for the best texture and flavor.
Reheating
If you prefer your brownies warm, gently reheat them in the microwave for 15 to 20 seconds or until just heated through. Be careful not to overheat as this can dry them out or melt the cream cheese swirl too much.
FAQs
Can I use regular food coloring instead of gel?
Yes, but gel food coloring is preferred because it provides a more vibrant red color without adding extra liquid that can affect the texture of your brownies.
What if I don’t have cream cheese for the swirl?
If you don’t have cream cheese, you could try mascarpone for a richer swirl or skip the swirl altogether for classic red velvet brownies, although the signature tangy cream cheese contrast will be missing.
How do I know when the brownies are done baking?
Insert a toothpick into the center of the brownies — it should come out with a few moist crumbs but not wet batter. The cream cheese swirl may remain gooey, but the brownies underneath need to be set.
Can I make these brownies gluten-free?
Yes! Substitute the all-purpose flour with a 1-to-1 gluten-free baking flour blend to keep the texture just right. Make sure your cocoa powder and other ingredients are gluten-free as well.
Do I have to chill the brownies before cutting?
It’s highly recommended to chill them for about an hour for cleaner, neater slices. This also helps the cream cheese swirl firm up slightly, making presentation tidier.
Final Thoughts
There’s something truly magical about the Red Velvet Brownies with Cream Cheese Swirl Recipe — it combines classic flavors with an irresistible texture and stunning visual appeal. Whether you bake it for yourself, friends, or family, you’re gifting everyone a slice of joy that’s both comforting and celebratory. Give this recipe a try and watch it become a beloved favorite in your baking repertoire!
Print
Red Velvet Brownies with Cream Cheese Swirl Recipe
- Prep Time: 15 minutes
- Cook Time: 30 minutes
- Total Time: 45 minutes
- Yield: 9 brownies
- Category: Dessert
- Method: Baking
- Cuisine: American
- Diet: Vegetarian
Description
Delight in these rich and moist Red Velvet Brownies with a luscious Cream Cheese Swirl, perfect for festive occasions or a decadent treat. This easy-to-make dessert combines classic red velvet flavor with a creamy, tangy swirl baked to perfection in just 45 minutes.
Ingredients
Brownie Batter
- 1/2 cup unsalted butter, melted
- 1 cup granulated sugar
- 2 large eggs, room temperature
- 1 tablespoon red food coloring
- 1 teaspoon vanilla extract
- 1 tablespoon unsweetened cocoa powder
- 3/4 cup all-purpose flour
- 1/4 teaspoon salt
Cream Cheese Swirl
- 8 ounces cream cheese, softened
- 1/4 cup granulated sugar
- 1 large egg yolk
- 1/2 teaspoon vanilla extract
Instructions
- Preheat and prepare pan: Preheat your oven to 350°F (175°C) and line an 8×8-inch baking pan with parchment paper to ensure easy removal and clean edges.
- Mix brownie batter: In a large mixing bowl, whisk together the melted butter and sugar until smooth. Add the eggs, red food coloring, and vanilla extract; whisk until the mixture is fully combined and vibrant red. Stir in the unsweetened cocoa powder to incorporate the classic red velvet chocolate flavor. Gently fold in the all-purpose flour and salt just until no dry streaks remain, being careful not to overmix to maintain tenderness.
- Spread batter in pan: Pour and spread the red velvet batter evenly into the prepared baking pan, creating a smooth surface.
- Prepare cream cheese swirl: In a separate bowl, beat the softened cream cheese, sugar, egg yolk, and vanilla extract until smooth and creamy, free of lumps.
- Add cream cheese dollops and swirl: Spoon dollops of the cream cheese mixture evenly over the brownie batter. Using a knife or skewer, gently swirl the cream cheese into the batter to create a marbled, decorative effect that will bake into the brownies.
- Bake: Place the pan in the preheated oven and bake for 28 to 32 minutes. Check for doneness by inserting a toothpick into the center— it should come out with a few moist crumbs but not wet batter.
- Cool and serve: Remove the brownies from the oven and let them cool completely in the pan. For cleaner slices, chill the brownies for about 1 hour before cutting into 9 squares. Enjoy!
Notes
- For clean slices, chill the brownies for 1 hour before cutting to firm up the cream cheese swirl.
- Use gel food coloring to achieve a more vibrant and true red velvet color.
- Store brownies in an airtight container in the refrigerator for up to 4 days to maintain freshness.
