

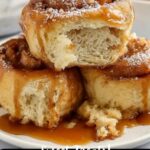
If you have a soft spot for sweet, sticky, and utterly delightful treats, then this Homemade Honey Buns Recipe is about to become your new favorite indulgence. Picture fluffy, golden fried dough spiraled with a warm cinnamon-sugar filling, all generously bathed in a luscious honey-butter glaze that adds just the perfect touch of sweetness and shine. This recipe is a beautiful blend of simple pantry staples transformed into bakery-worthy honey buns that are irresistibly tender and packed with cozy flavor. Whether for a special brunch, a comforting afternoon snack, or a sweet surprise anytime, making these honey buns at home is pure joy.
Ingredients You’ll Need
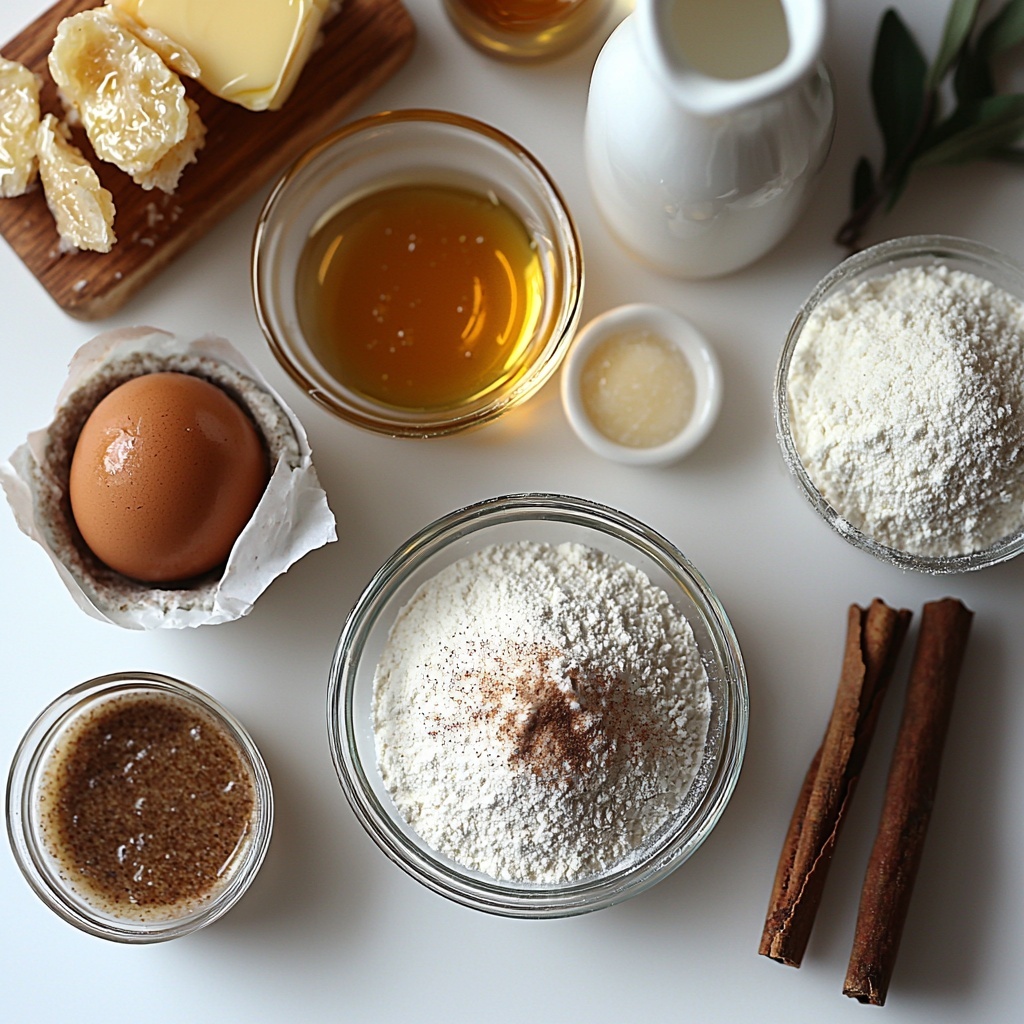
Getting started on your Homemade Honey Buns Recipe means gathering a handful of simple yet essential ingredients. Each one plays a crucial role—flour creates the soft structure, cinnamon sugar provides the comforting spice, and the honey-butter glaze adds that signature shine and sweetness that makes honey buns so crave-worthy.
- All-purpose flour: The backbone of the dough, providing perfect texture and chewiness.
- Granulated sugar: Adds balanced sweetness to dough and filling, ensuring every bite is delightful.
- Salt: Enhances overall flavor, keeping the sweetness vibrant rather than flat.
- Whole milk (warmed): Gives richness and moisture to the dough for a tender crumb.
- Instant yeast: The magic that makes your dough rise light and fluffy in no time.
- Butter (melted and cooled): Adds buttery flavor and moistness inside the dough and the glaze.
- Egg: Helps bind ingredients together while enriching the dough.
- Vanilla extract: Infuses the dough and glaze with subtle aromatic warmth.
- Cinnamon: Spices up the sugar filling, creating the classic honey bun flavor.
- Vegetable oil: Perfect for shallow frying, producing golden, crisp exteriors.
- Powdered sugar: Essential for a smooth, sweet glaze coating each bun.
- Honey: The star sweetener that defines these buns and gives that signature golden glaze.
How to Make Homemade Honey Buns Recipe
Step 1: Prepare the Dough
Start by whisking together your dry ingredients—flour, sugar, and salt—in a stand mixer bowl. Meanwhile, warm the milk until it’s about 110 degrees Fahrenheit, then blend in the yeast, melted butter, egg, and vanilla extract. Adding the wet ingredients to the dry, knead with a dough hook on medium speed for about 10 minutes. This process develops that soft but slightly sticky dough perfect for rolling and shaping honey buns.
Step 2: Let the Dough Rise
Grease a large bowl with a bit of oil and tuck your dough inside. Cover it snugly with plastic wrap to maintain warmth and moisture, and let it rise for about an hour and a half. You’ll notice the dough nearly double in size, becoming airy and springy—this is where your buns start to get their tender texture.
Step 3: Roll and Fill the Dough
Once risen, punch down the dough gently to release excess air and move it to a floured surface. Roll it out to a roughly 15-inch by 8-inch rectangle. Sprinkle a cinnamon-sugar mixture evenly over the top, pressing lightly to help it adhere. This sweet spice combo is the heart of the classic honey bun flavor we all adore.
Step 4: Shape and Slice the Buns
Roll the dough tightly into a log, lengthwise. To keep everything neat, dip your fingers in water and pinch the seam closed, sealing that sugary goodness inside. Cut the log into slices about an inch thick using unscented floss or a sharp knife for clean edges. Place them on wax paper, cover loosely, and allow a second, shorter rise so they puff up beautifully before frying.
Step 5: Fry the Buns
Heat 2 to 2½ cups of vegetable oil in a pan over medium-high heat. Fry the buns a few at a time, letting them brown about 1½ to 2 minutes per side. The oil turns them golden and crispy on the outside while keeping the inside incredibly soft and tender. Drain on paper towels to remove excess oil.
Step 6: Dip in Honey-Butter Glaze
While the buns are still warm, whisk together melted butter, powdered sugar, honey, vanilla extract, and salt to form the glaze. Slowly add hot water to thin it out into a smooth, pourable consistency. Dip each bun to coat thoroughly, and then set them on a cooling rack to let the glaze set. This final touch seals in the sweetness and creates that irresistible sticky finish.
How to Serve Homemade Honey Buns Recipe
Garnishes
While these honey buns shine on their own, a sprinkle of finely chopped nuts like pecans or walnuts adds a delightful crunch and a nutty contrast to the sticky glaze. You can also dust a bit of extra cinnamon or drizzle some melted chocolate for a fun variation that makes every bite special.
Side Dishes
Serve these honey buns alongside a hot cup of coffee or spiced chai for a comforting combination. They are also wonderful paired with fresh fruit or a dollop of whipped cream to balance the richness, making your snack or breakfast feel a little more indulgent yet fresh.
Creative Ways to Present
For gatherings, arrange the honey buns in a circle on a pretty platter with small bowls of maple syrup or extra honey for dipping. You can even stack them in a tiered basket for a cozy bakery-style display that invites everyone to grab a warm bun and savor the moment.
Make Ahead and Storage
Storing Leftovers
If you find yourself with leftover honey buns (though that rarely happens!), store them in an airtight container at room temperature for up to two days. This keeps them soft while preserving the glaze’s sticky allure. Avoid refrigerating as that can dry them out.
Freezing
To freeze, arrange the buns on a baking sheet without touching, freeze until firm, then transfer to a freezer-safe bag. They keep well for up to two months. When you’re ready to indulge again, simply thaw at room temperature and refresh with a quick dip in warm glaze or a gentle reheat in the oven.
Reheating
Warm leftover buns in a microwave for about 15 seconds or pop them in a preheated oven at 350°F for 5–7 minutes. This brings back that fresh-baked softness and helps the glaze soften if it’s become a bit firm, making every bite taste just as heavenly as when freshly made.
FAQs
Can I make this dough without a stand mixer?
Absolutely! While a stand mixer makes kneading easier, you can knead the dough by hand on a floured surface for about 12 to 15 minutes until it’s soft and slightly sticky. It’s a bit of a workout but very rewarding.
Is it possible to bake the honey buns instead of frying?
Yes, you can bake these buns instead. Place them on a parchment-lined baking sheet and bake at 375°F for 15–18 minutes or until golden brown. The texture will be a bit different—less crispy outside but still tender and sweet.
What type of honey works best for the glaze?
Use a mild, floral honey like clover or wildflower to allow the cinnamon and vanilla notes to shine through. Stronger honeys like buckwheat also work but will add a bolder flavor to the glaze.
Can I make the glaze ahead of time?
You can prepare the glaze ahead, but it’s best stored in the refrigerator in an airtight container. Rewarm gently and thin with a little hot water before dipping the buns to keep that perfect consistency and shine.
What is the secret to moist, soft buns in this recipe?
The combination of warm milk, melted butter, and a generous kneading routine results in a tender dough with a soft crumb. Also, allowing the dough to rise properly ensures fluffy buns with just the right amount of chew.
Final Thoughts
Making this Homemade Honey Buns Recipe is like wrapping yourself in a warm, sweet hug — you get a little magic in every bite. The process is straightforward, the ingredients are simple, and the results are nothing short of spectacular. So go ahead, treat yourself and your loved ones to these deliciously comforting honey buns. Once you try them, they will surely become a beloved recipe you’ll want to make again and again.
Print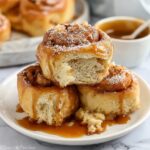
Homemade Honey Buns Recipe
- Prep Time: 30 minutes
- Cook Time: 10 minutes
- Total Time: 2 hours 10 minutes
- Yield: 12 servings
- Category: Dessert
- Method: Frying
- Cuisine: American
Description
These homemade honey buns are soft, fluffy, and filled with a warm cinnamon-sugar mixture. They are shallow-fried to a golden perfection and coated with a luscious honey-butter glaze, making them an irresistible treat for breakfast or dessert.
Ingredients
For the Dough:
- 2¼ cups all-purpose flour
- ¼ cup granulated sugar
- ½ tsp salt
- ⅔ cup whole milk, warmed to about 110 °F
- 1 packet (≈ 2¼ tsp) instant yeast
- ⅓ cup butter, melted and cooled
- 1 large egg
- 2 tsp vanilla extract
Cinnamon‑Sugar Filling:
- ¼ cup granulated sugar
- 1½ tsp ground cinnamon
For Frying:
- 2–2½ cups vegetable oil (enough to shallow‑fry buns)
Honey‑Butter Glaze:
- 3 tbsp butter, melted
- 1¼ cups powdered sugar, sifted
- 2 tbsp honey
- 2 tsp vanilla extract
- ½ tsp salt
- ⅓–½ cup hot water, to thin glaze
Instructions
- Prepare Dry Ingredients: In a stand mixer bowl, combine the all-purpose flour, granulated sugar, and salt to create the base dry mixture for the dough.
- Activate Yeast Mixture: Warm the whole milk to about 110 °F. Whisk in the instant yeast, melted butter, egg, and vanilla extract to form the wet mixture.
- Knead the Dough: Add the wet mixture into the dry ingredients and knead with the dough hook on medium speed for about 10 minutes. Scrape the bowl sides occasionally. The dough should be slightly sticky at the end.
- First Rise: Grease a large bowl with oil. Place the dough inside, cover with plastic wrap, and let it rise for 1½ hours or until it has doubled in size.
- Shape Dough: Punch down the risen dough and transfer it to a floured surface. Roll it out into a roughly 15″ × 8″ rectangle.
- Prepare Cinnamon Filling: Mix the granulated sugar and ground cinnamon together. Sprinkle the cinnamon-sugar mixture evenly over the rolled-out dough, pressing it in gently.
- Roll and Seal: Roll the dough tightly into a log lengthwise. Dip your fingers in water and pinch the seam closed to seal the log.
- Slice Dough: Use unscented floss or a sharp knife to cut the log into approximately 1″ thick slices. Place the slices on wax paper, cover loosely with plastic wrap, and let rise for another 30 minutes.
- Heat Oil and Fry: Heat 2 to 2½ cups vegetable oil in a pan over medium-high heat. Fry the buns a few at a time for about 1½–2 minutes per side or until golden brown. Drain on paper towels.
- Make the Glaze: While the buns are still warm, whisk together the melted butter, powdered sugar, honey, vanilla extract, and salt. Slowly stir in the hot water until the glaze is thick but pourable.
- Glaze the Buns: Dip each warm bun in the glaze, coating the tops and sides thoroughly. Transfer the glazed buns to a cooling rack set over parchment paper and allow the glaze to set for about 20 minutes.
Notes
- Ensure the milk is not too hot when activating the yeast, as temperatures above 110 °F can kill the yeast.
- Use unscented floss for slicing to prevent sticking without tearing the dough.
- Maintain medium-high heat for frying to get a crisp exterior without burning the buns.
- Adjust the glaze thickness by adding hot water gradually to achieve the desired consistency.
- Store any leftovers in an airtight container and reheat gently before serving to maintain softness.