
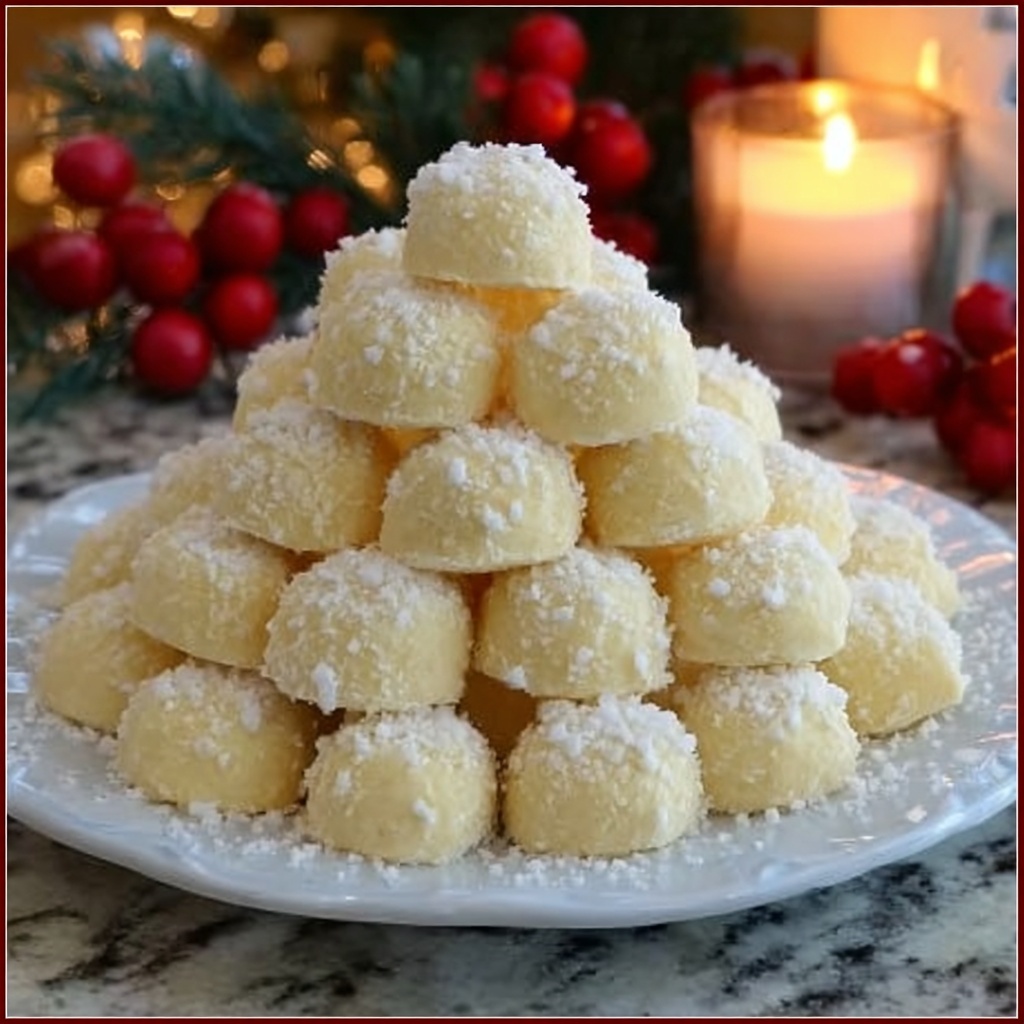
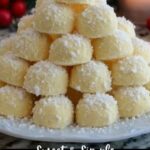
If you have a sweet tooth and love melt-in-your-mouth treats, this Easy Butter Mints Recipe is sure to become a fast favorite. These delicate little buttery confections combine creamy texture and bright peppermint flavor in the most delightful way, making them perfect for sharing at parties, gifting during the holidays, or simply enjoying whenever you need a refreshing little pick-me-up. With just a handful of simple ingredients and straightforward steps, you’ll be amazed at how effortlessly these charming butter mints come together, bringing a burst of joy to your kitchen and your taste buds.
Ingredients You’ll Need
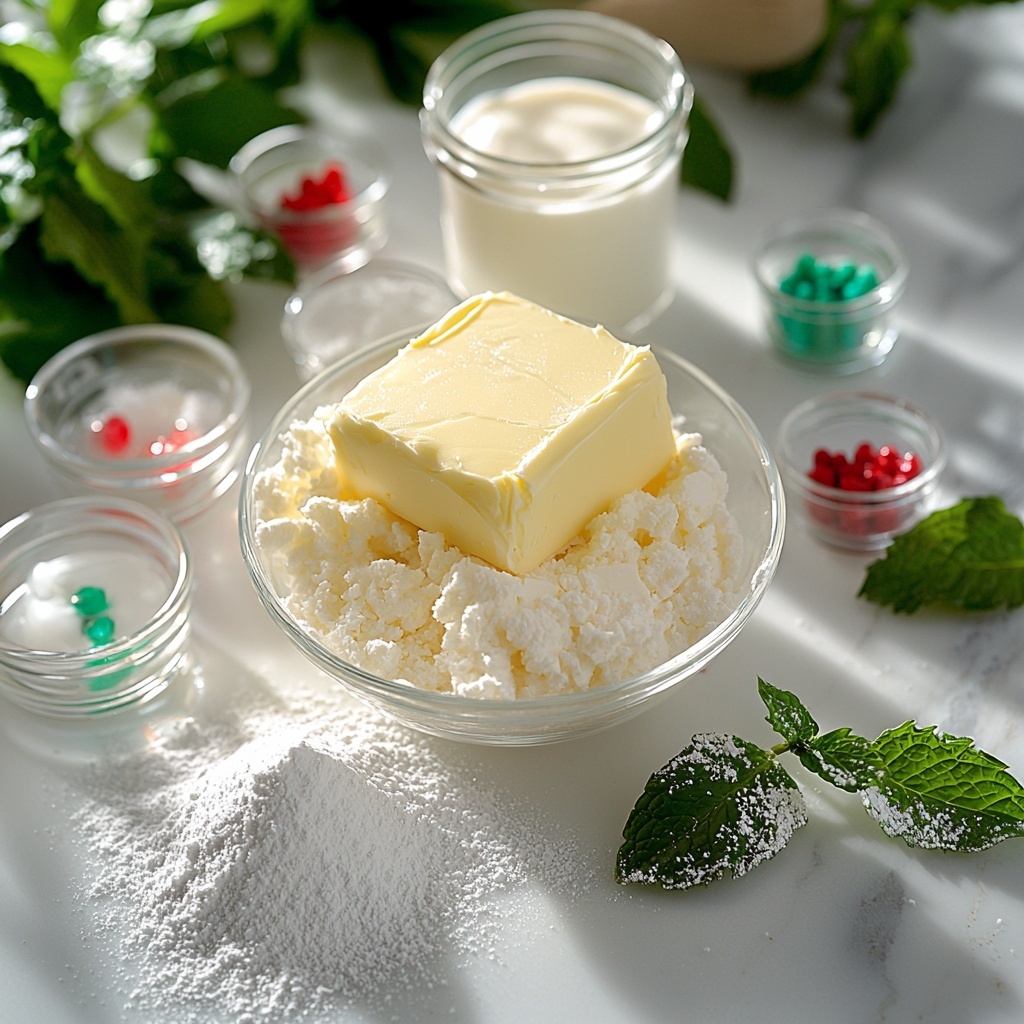
Every ingredient in this Easy Butter Mints Recipe plays a key role in achieving that perfect balance of smoothness, sweetness, and refreshing flavor. From the creaminess of the butter to the light cooling touch of peppermint, these elements work together harmoniously to give you a treat you’ll want to make again and again.
- Unsalted butter, 1/2 cup, softened: Provides the rich, creamy base that makes these mints melt beautifully in your mouth.
- Powdered sugar, 4 cups: Adds the essential sweetness and a fine texture, helping the mints hold their shape.
- Heavy cream, 2 tablespoons: Moisturizes the mixture, ensuring the dough is soft but workable.
- Peppermint extract, 1/2 teaspoon: Infuses the whole batch with that classic minty freshness that defines butter mints.
- Fine sea salt, 1/8 teaspoon: Enhances and balances all the sweet and buttery flavors.
- Gel food coloring (optional): Perfect for giving your mints festive or personalized colors without altering their texture.
How to Make Easy Butter Mints Recipe
Step 1: Cream the Butter and Salt
Begin by softening your unsalted butter and fine sea salt together in a mixing bowl. Beat them until the mixture becomes smooth, creamy, and slightly lighter in color. This step is important because it aerates the butter, creating the perfect silky base for your butter mints.
Step 2: Mix in Peppermint Extract and Heavy Cream
Next, add the peppermint extract and heavy cream to your creamy butter mixture. Beat until everything is fully combined, smooth, and silky. The cream adds moisture while the peppermint injects that signature flavor that butter mint lovers crave.
Step 3: Gradually Add Powdered Sugar
Slowly incorporate the powdered sugar, adding it about a cup at a time. Start mixing on low speed to keep the sugar from flying all over your kitchen. Continue until a very thick, soft dough forms that you can easily handle.
Step 4: Adjust the Texture
Check the texture of your dough carefully. If it feels sticky, sprinkle in a little more powdered sugar. If it’s too dry or crumbly, add a few drops of heavy cream until it reaches that perfect softness without being sticky.
Step 5: Add Color (Optional)
If you want to make your butter mints stand out, divide the dough into portions and knead in a drop or two of gel food coloring to each. This is your chance to get creative—classic pastel mints or vibrant hues are all possible!
Step 6: Roll into Ropes
Lightly dust a clean surface with powdered sugar and roll each dough portion into long ropes about 1/2 inch thick. This makes cutting into uniform bite-sized pieces much easier and tidier.
Step 7: Cut into Pillow Shapes
Using a small sharp knife or bench scraper, cut the ropes into tiny pillow-shaped pieces approximately 1/2 inch wide. Make sure to separate them to prevent sticking as they dry.
Step 8: Let Them Dry
Spread out the cut mints in a single layer on a parchment-lined baking sheet. Let them dry at room temperature for at least 12 hours or overnight. They should develop a firm outside while remaining soft and creamy on the inside.
How to Serve Easy Butter Mints Recipe
Garnishes
A sprinkle of finely crushed peppermint candies or a dusting of edible glitter can add extra flair to your butter mints. These subtle touches not only make them look irresistible but also enhance their refreshing taste.
Side Dishes
Butter mints pair wonderfully with hot beverages like coffee, tea, or hot chocolate. Serve them alongside a warm cup during chilly days or gatherings to delight guests with a sweet palate cleanser.
Creative Ways to Present
Place your butter mints in decorative glass jars, small gift boxes tied with ribbons, or colorful cupcake liners for an eye-catching display. They also make thoughtful homemade gifts that spread joy and show you care.
Make Ahead and Storage
Storing Leftovers
Store any leftover butter mints in an airtight container at room temperature. They will keep their freshness and softness for up to two weeks, ready to be enjoyed whenever a craving strikes.
Freezing
If you want to prepare ahead, freeze your butter mints in a tightly sealed container. When wrapped well, they stay vibrant and flavorful for up to three months—just bring them to room temperature before serving.
Reheating
There’s no need to reheat butter mints since their charm lies in their cool, creamy texture. Simply thaw frozen mints at room temperature and enjoy the fresh, melt-in-your-mouth experience.
FAQs
Can I use salted butter instead of unsalted?
It’s best to use unsalted butter so you can control the salt level precisely. Salted butter might make your mints too salty and throw off the delicate flavor balance.
Why do the mints need so long to dry?
Allowing the mints to dry overnight forms a subtle outer shell that keeps their shape and gives the perfect texture contrast between the firm exterior and soft interior.
Can I substitute peppermint extract with another flavor?
Absolutely! Feel free to experiment with vanilla, almond, or even citrus extracts to create unique butter mint variations tailored to your taste.
What if my dough is too sticky to work with?
Add more powdered sugar a little at a time until the dough feels soft but no longer sticky. This adjustment helps when humidity affects the dough’s consistency.
How should I store colored butter mints?
Store colored mints away from direct sunlight to prevent fading, and keep them in an airtight container to maintain both color vibrancy and moisture.
Final Thoughts
This Easy Butter Mints Recipe is a wonderful way to craft sweet, buttery delights that bring a touch of homemade magic to any occasion. Once you try making these charming mints, you’ll understand why they are a beloved classic—simple to make, easy to share, and delicious every time. Dive in, have fun with the colors and flavors, and trust that these little mints will become a favorite treat to enjoy and gift all year round!
Print
Easy Butter Mints Recipe
- Prep Time: 20 minutes
- Cook Time: 0 minutes
- Total Time: 12 hours 20 minutes
- Yield: 8 servings
- Category: Confectionery
- Method: No-Cook
- Cuisine: American
- Diet: Vegetarian
Description
These Easy Butter Mints are a delightful homemade treat that combines creamy butter, powdered sugar, and refreshing peppermint extract to create soft, pillow-shaped mints. Perfect for holiday gatherings or as a sweet homemade gift, these mints are simple to make and require no cooking or baking. Customize them with gel food coloring for a festive touch.
Ingredients
Butter Mint Dough
- 1/2 cup unsalted butter, softened
- 4 cups powdered sugar
- 2 tablespoons heavy cream
- 1/2 teaspoon peppermint extract
- 1/8 teaspoon fine sea salt
- Gel food coloring, optional
Instructions
- Cream the butter and salt: In a mixing bowl, cream the softened unsalted butter and fine sea salt together until the mixture is smooth, creamy, and slightly lighter in color.
- Add peppermint and cream: Add the peppermint extract and heavy cream to the butter mixture, then beat until fully combined and the mixture has a silky texture.
- Incorporate powdered sugar: Gradually add the powdered sugar, about one cup at a time, starting on low speed to prevent sugar dust from puffing everywhere. Continue until a very thick, soft dough forms.
- Adjust dough consistency: Check the texture of the dough. If it’s sticky, add a bit more powdered sugar; if it feels dry and crumbly, add a few drops of cream. Mix to achieve a smooth, workable dough.
- Optional coloring: Divide the dough into portions if multiple colors are desired. Knead a drop or two of gel food coloring into each portion until the color is even throughout.
- Roll into ropes: Lightly dust a surface with powdered sugar, then roll each colored dough portion into long ropes about 1/2 inch thick.
- Cut into pieces: Using a small sharp knife or bench scraper, cut the ropes into tiny pillow-shaped pieces approximately 1/2 inch wide. Separate the pieces to prevent sticking.
- Dry the mints: Place the cut mints in a single layer on a parchment-lined baking sheet. Let them dry at room temperature for at least 12 hours or overnight until they are firm on the outside but still soft when bitten.
Notes
- You can store the finished butter mints in an airtight container at room temperature for up to two weeks.
- For a firmer texture, let the mints dry longer before storing.
- If you prefer a stronger peppermint flavor, increase the peppermint extract slightly, but be cautious as it can be overpowering.
- Gel food coloring is recommended to avoid adding extra moisture; avoid liquid food coloring as it may alter the dough texture.
- These mints do not require refrigeration and should be kept away from heat to prevent melting.